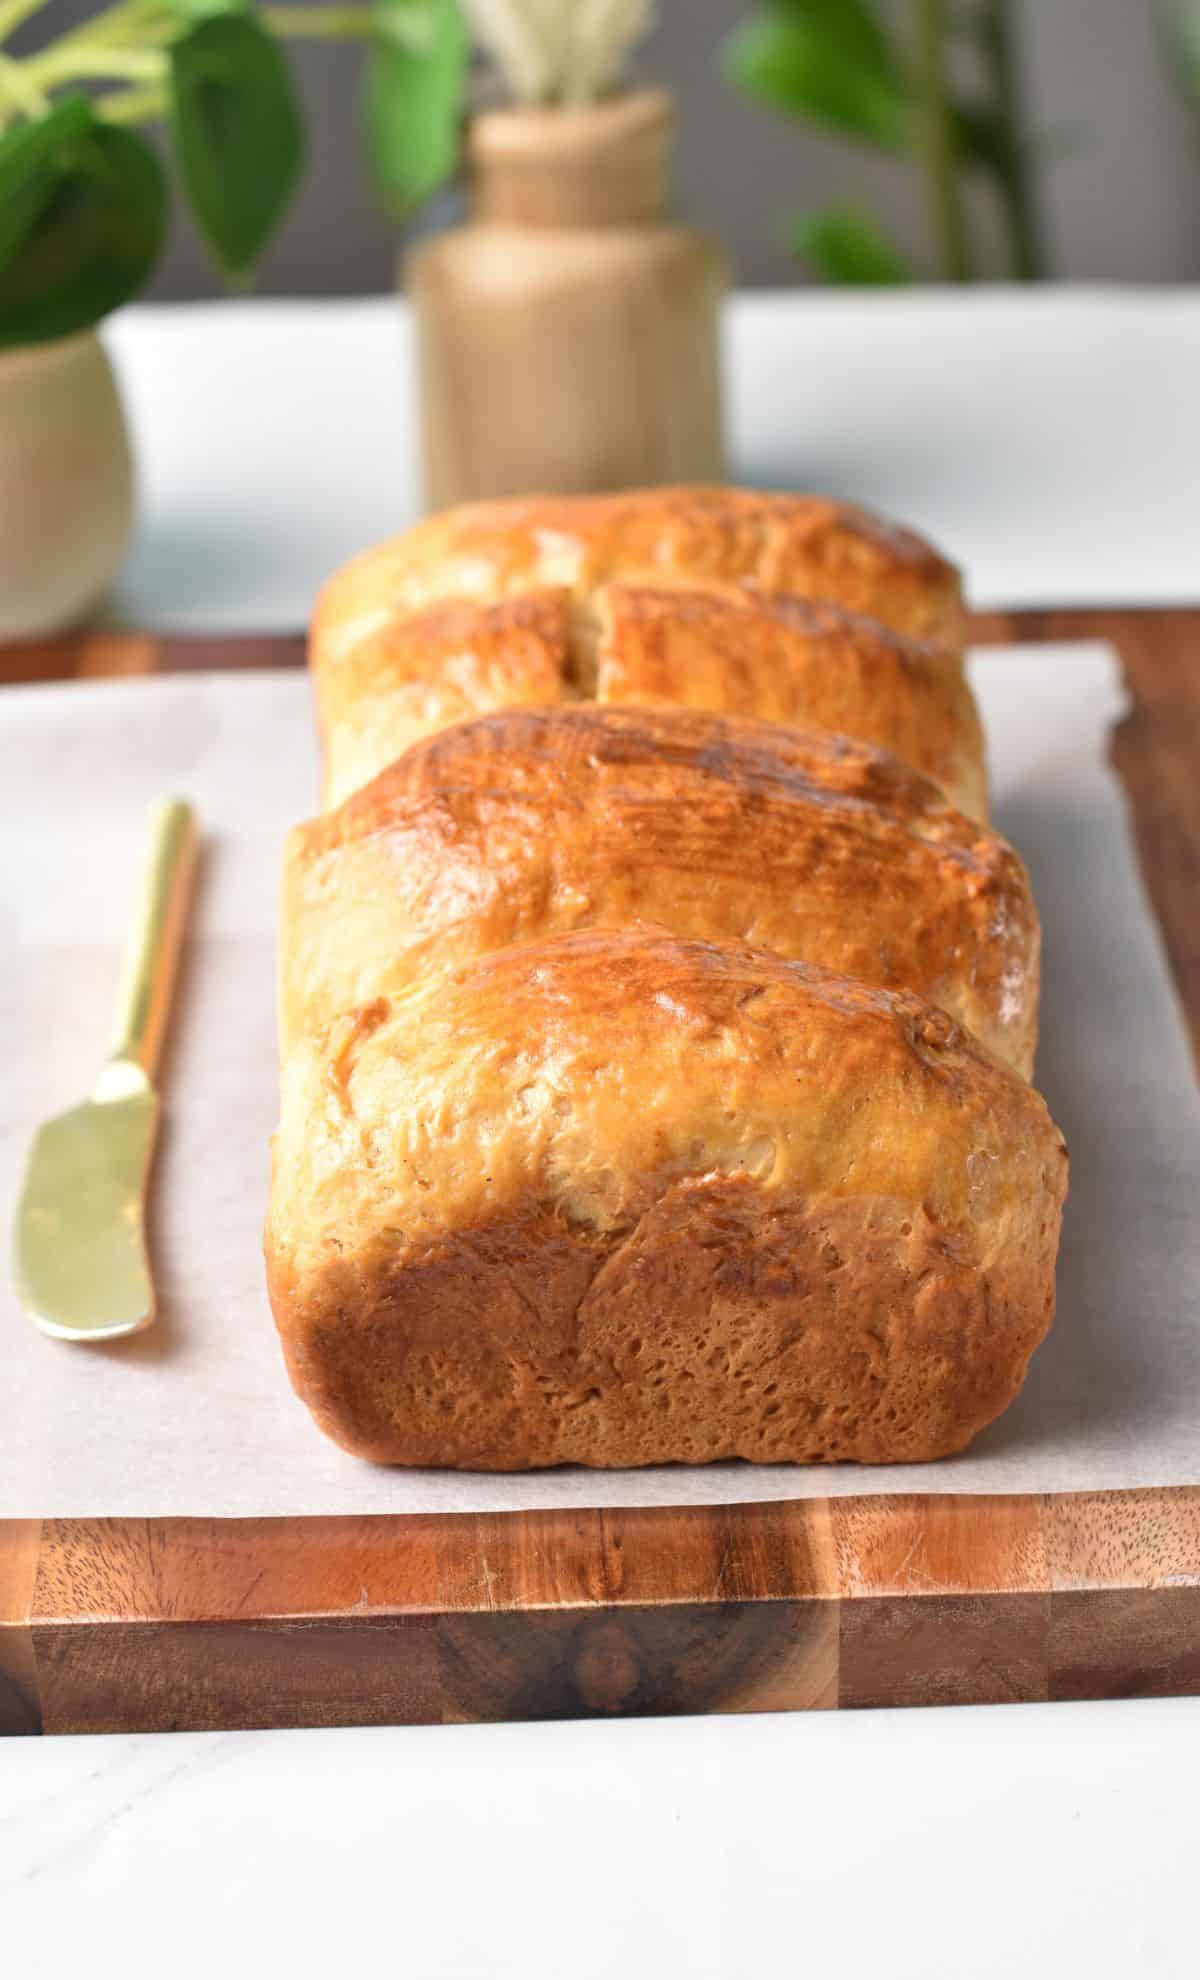
Disse Yoghurtboller er latterlig enkle, gjærfrie brødruller laget med bare 3 ingredienser og klare på under 40 minutter.
I love making simple yeast-free recipes, like my Gjærfrie kanelboller, Vegansk mandelcroissantdeigog Enkle hvitløksknuter. It makes the whole baking easier and faster, which saves me so much time in our busy weeks!
Selv om hele oppskriften er rett nedenfor, bør du ikke gå glipp av alle tipsene mine lenger ned, inkludert ingrediensbytter, matlagingstips og trinnvise bilder!
Liker du denne oppskriften?
Legg igjen en kommentere nedenfor eller gå til vår Facebook-side der jeg svarer på (nesten) alle kommentarer, vår Instagram-side for inspirasjon, eller vår Pinterest for å lagre oppskrifter!

Yoghurtboller
Ingredienser
- 2 ¾ kopper Selvhevende mel - 1 notater
- 1 cup Vanilje plantebasert yoghurt - 2 notater
- 5 ss Smeltet melkefritt smør (usaltet) - avkjølt
Instruksjoner
- I en stor bolle tilsetter du selvhevende mel, vaniljeyoghurt og smeltet, avkjølt plantebasert smør.
- Rør med en slikkepott, eller bland deigen i en kjøkkenmaskin med eltekroken.
- Når deigen begynner å se smuldrete ut, smør hendene lett og elt den til den danner en ball. Hvis den er for klissete, tilsett mer hvetemel (ikke selvhevende). Hvis den er for tørr, tilsett litt mer yoghurt.
- Sett deigen til side i 10 minutter.
- Forvarm ovnen til 180 °C. Kle en brødform på 23 x 13 cm med bakepapir. Smør papiret og sett formen til side.
- Del deigen i 4 like deler.
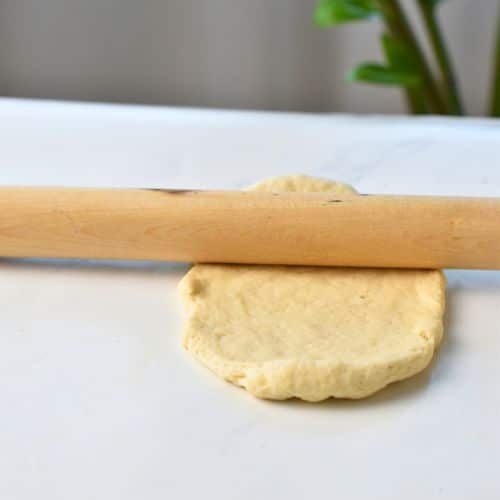
- Roll each portion into a small rectangle – the smaller width should match the pan – 5 inches.
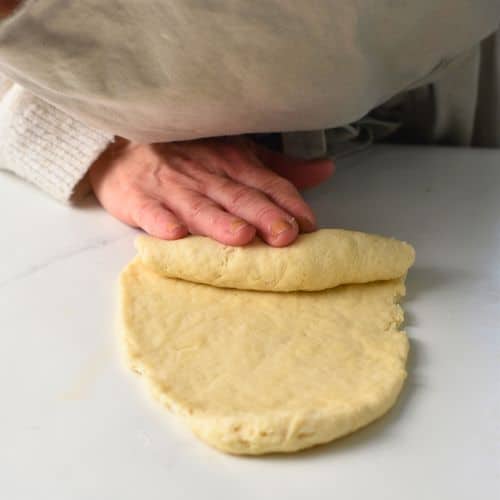
- Roll the rectangle of dough into a bun, starting from the smaller side to the other one – look at the pictures above for help.
- Gjenta disse trinnene for de siste 3 deigbitene.
- Legg hver bolle i pannen, dekk den med et håndkle og sett den til side i 10 minutter.
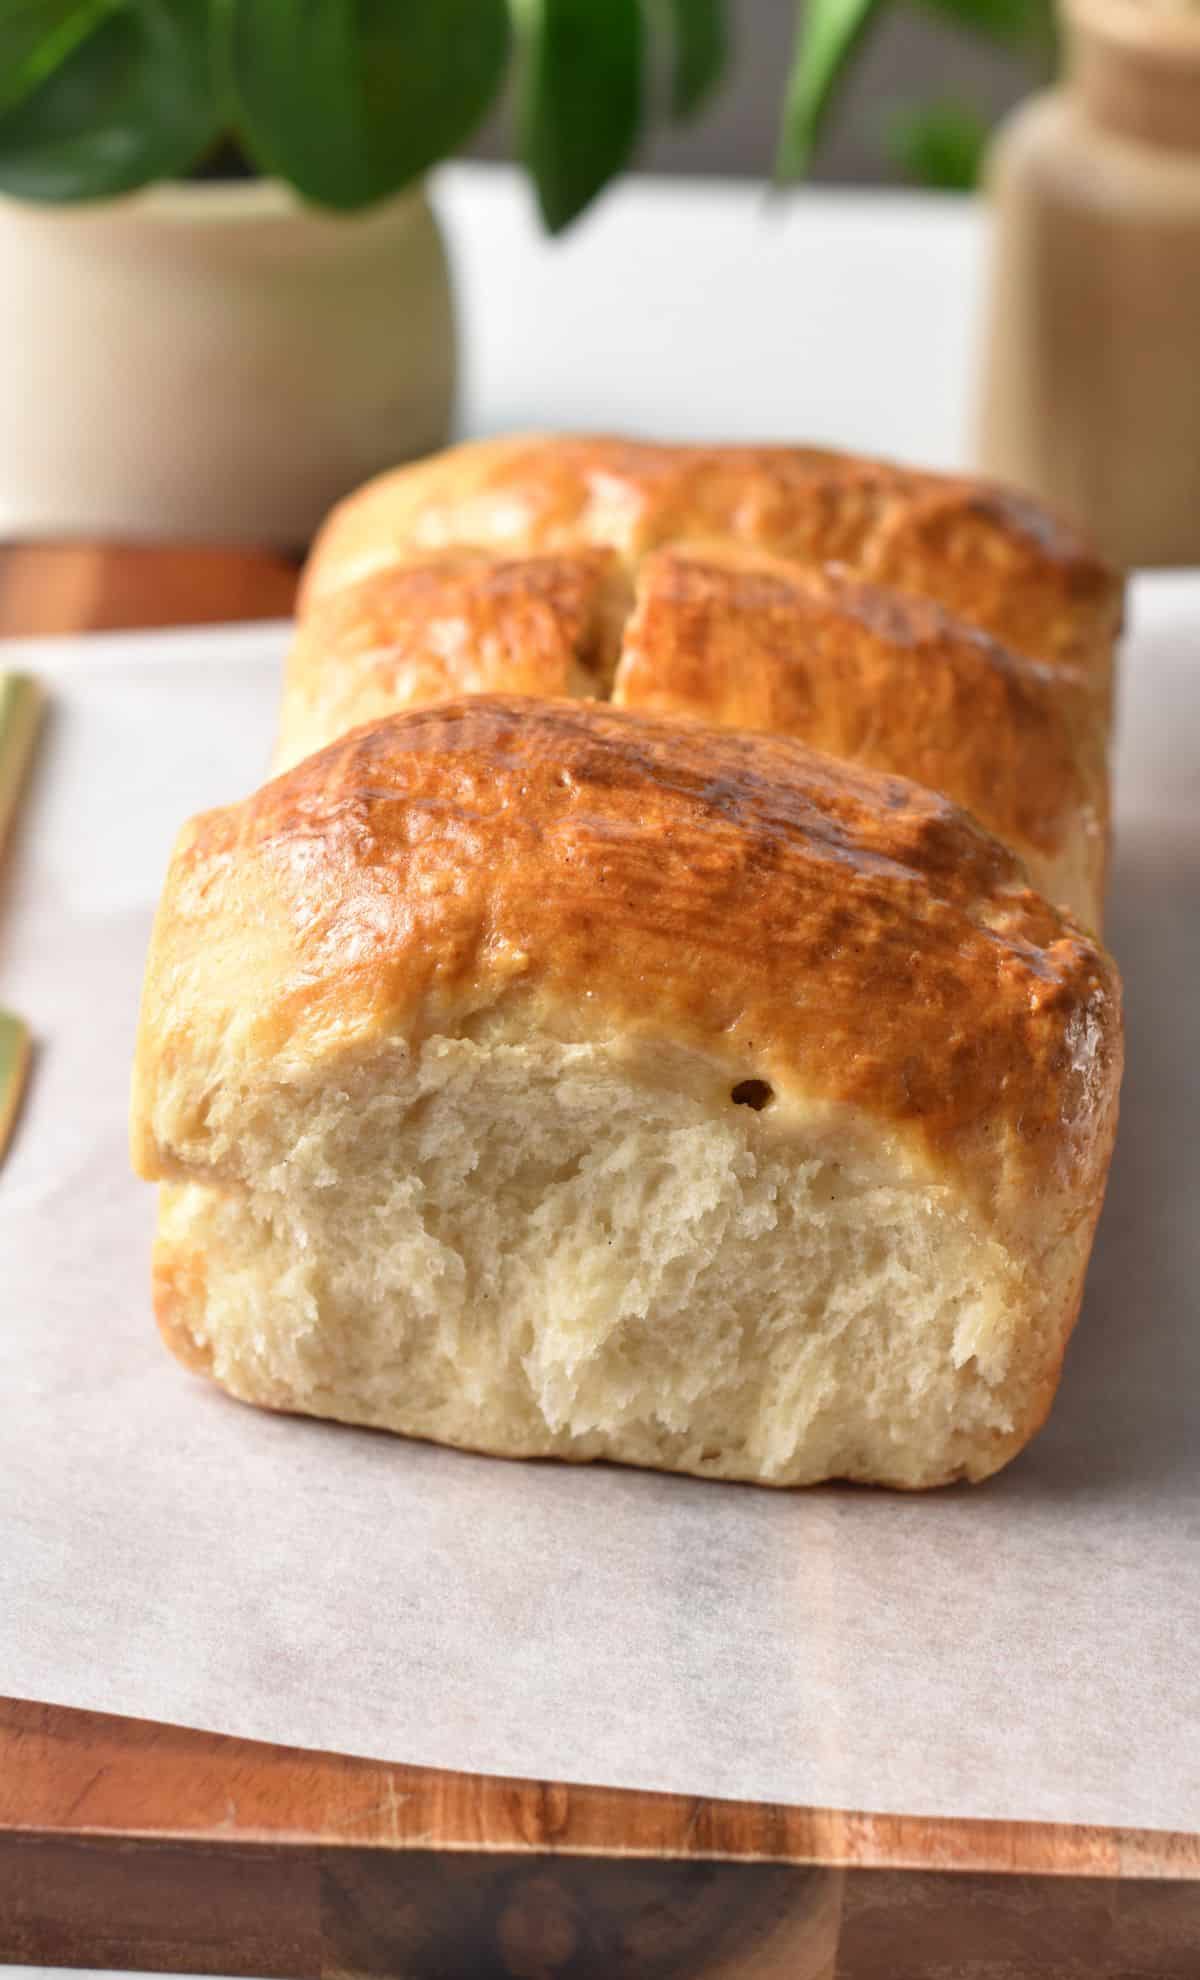
- Fjern håndkleet og stek bollene på midterste rille i ovnen i 35–40 minutter ved 180 °C til de er gyllenbrune på toppen.
- Ta ut av ovnen og pensle rikelig med lønnesirup.
- La bollene avkjøles i 5–10 minutter i formen og i minst 45 minutter til 1 time på en rist.
Merknader
Ernæring
Ingredienser og erstatninger
- Selvhevende mel – Self-rising flour is a simple combination of all-purpose flour with baking powder. If you don’t have it, you can make your own by mixing one cup of flour with 2 teaspoons of baking powder. For a gluten-free option, use my glutenfri omformer, men ikke glem bakepulveret.
- Vaniljeyoghurt – I use soy vanilla yogurt because it brings more protein than other alternatives, but you can use any yogurt you like.
- Plantebasert smør – There are many brands of vegan butter that works, like Earth Balance, or Miyoko’s Creamery. Measure the butter once melted.
How to Make Yogurt Buns
You’ll find all the details in the recipe card below, but I’ve included here photos of the main steps.
The trick to making these yogurt buns fluffy with stringy pieces like in my vegan brioche is to divide the dough into 4 equal parts, roll flat with a rolling pin, then fold and roll into a cylinder see picture. This technique make the brioche stringy and so close to a yeast brioche.


Serveringsforslag
These buns can be served for breakfast, snack, or even dessert. For breakfast, serve them with babysyltetøy, nut butter, or add up to 1/2 cup of chocolate chips in the dough to make chocolate chips buns.
You can also use them as a quick snack at home, work, or in a kid’s lunchbox. For dessert, they can be served dipped into melted chocolate or peanut butter sauce.
Tips for Perfect Buns
These buns are really easy to make, but I can give you a few more tips to have them right every single time.
- Elt deigen with your hands or in a stand mixer until it forms a ball that is a bit sticky. Cover and let it rest for 10 minutes.
- Sprinkle flour on the top and divide the dough into 4 equal pieces to make sure they bake at the same time.
- Du kan bruke any yogurt but vanilla-flavored yogurt is better as it sweetens and flavors the dough. If you use unsweetened yogurt, add 1/3 cup of sugar to the yogurt or/and 1 teaspoon of vanilla extract for flavor.
- Brush the hot buns with maple syrup for a shiny, glossy effect and to boost the flavor and sweetness.
- The buns last for 3 days at room temperature. After that, they harden faster than yeasted brioche.
- Try them with plain yogurt, add salt and garlic powder to the dough to make savory buns and make a vegan sub meatball sandwich using my TVP-kjøttboller.


Hei!
Thanks for your delicious recipes!
Can I use plant based almond yoghurt?
Can I brush them before baking with egg diluted with water for a neutral golden surface?
I am pretty sure any plant-based yogurt work, they all deliver slightly different texture, coconut is higher in fat than almond so yours should be even lighter. Please come back here and let me know ! You can brush the top with egg if you eat them, it will be fine.
can I use Greek yogurt?
Absolutely, any yogurt will work well.
i am curious if i can use whole wheat flour, add some spilt flour and buck wheat and make a more wholesome bun. would i have to change much about the ratio of yogurt to flour in this case?
Not really, the reason why this simple recipe using minimal ingredient is so fluffy, is because it’s made of white flour. As soon as you are gonna had fiber from wholeweat, the buns will harden and buckwheat will be even worst, turning them into a rocky texture.
Can these be made with almond flour?
No, it will not work at all, almond flour don’t firm up food as flour, you will end up with a wet mess that never bake.
Could you use regular butter or margarine and regular milk?
Ja visst!
Delicious! don’t look quite as perfect as yours haha, but taste lovely. I’ve frozen 3 of them and had the other in small slices for breakfast.
I make A LOT of your recipes. Thank you so much for sharing.
I love that you bake so many of my recipes, THANK YOU!
Quick, easy and tasty. Super fluffy in the middle.
I’m a first time bread maker and this was super easy. I used plain yogurt and regular butter. They turned out fluffy and very tasty.
For some reason the dough did not rise after baking and turned out to be hard and not fluffy . I followed exact steps not sure what went wrong . Instead of sugar I added maple syrup
I think it’s probably because of the maple syrup.
I’ll certainly will bake it