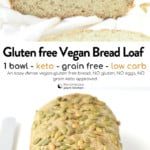
Questo facile Ricetta del pane vegano chetogenico è una pagnotta semplice e deliziosa fatta senza lievito né macchina del pane! Inoltre, questa è una ricetta di pane cheto a basso contenuto di carboidrati con solo 2.2 grammi di carboidrati netti a fetta!
Seguo una dieta chetogenica da molti anni e preparare il pane vegano per mio marito vegano è la mia passione, come ad esempio Pane di farina d'avena, Pane vegano senza glutine, o Pane piatto con 2 ingredienti. E se ho fretta, faccio il mio Pane con 2 ingredienti.
Potresti aver provato alcuni dei miei pani chetogenici su Dolce come il miele, ma come sapete, nella maggior parte dei casi hanno bisogno di uova.
Ti piace questa ricetta?
Lascia un commento di seguito o vai al nostro pagina Facebook dove rispondo a (quasi) tutti i commenti, il nostro pagina Instagram per ispirazione o il nostro Pinterest per salvare le ricette!
Pane vegano chetogenico
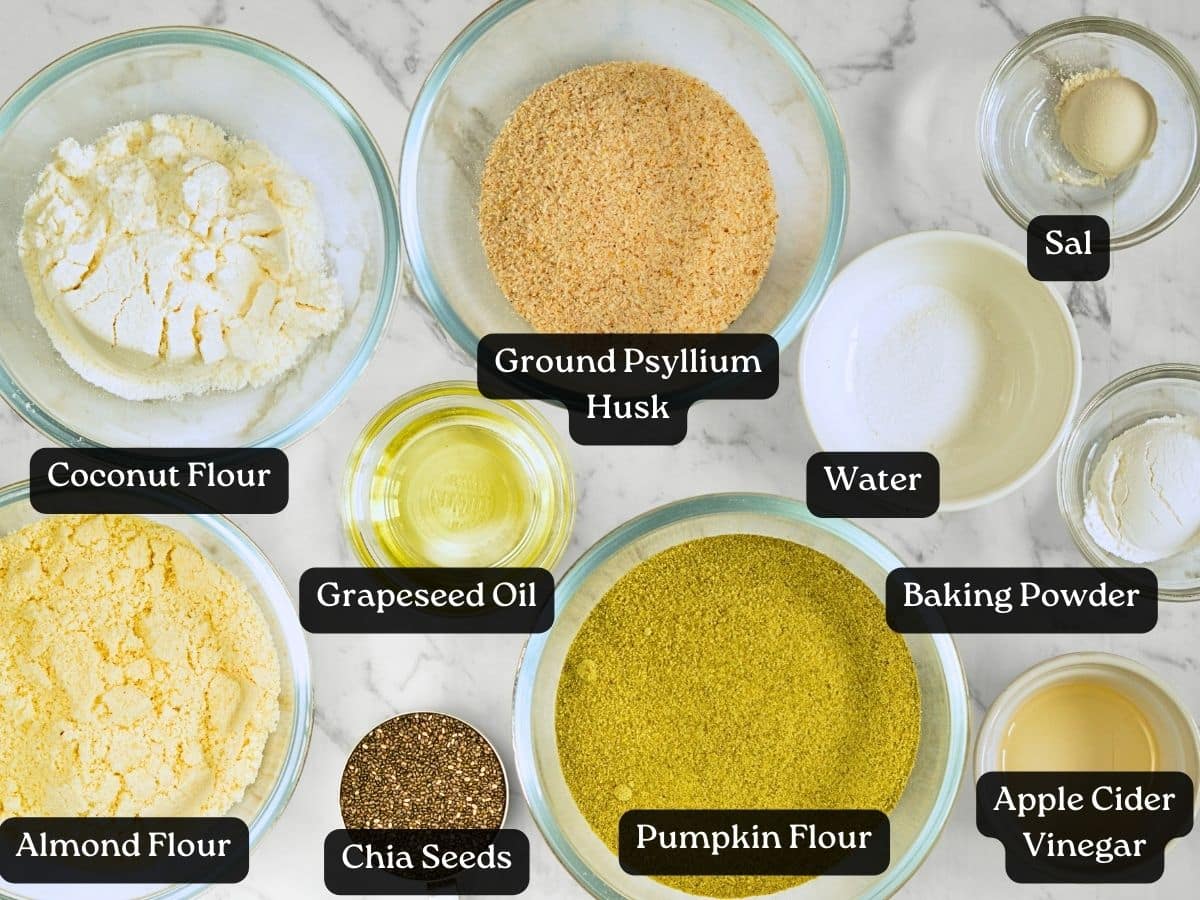
Ingredienti
- 1 bicchiere Farina di mandorle
- 1 bicchiere Farina di zucca - vedi nota per creare il tuo
- ½ bicchiere noce di cocco Farina
- ⅓ bicchiere buccia di psillio macinata
- ¼ bicchiere I semi di Chia
- 1 cucchiaio Lievito in polvere
- 1 cucchiaino da tè Sale
Ingredienti liquidi
- 2 cucchiai Olio di semi d'uva - o olio d'oliva, olio di mandorle
- 1 cucchiaino da tè Aceto di sidro di mele - o succo di limone
- 2 tazza Acqua - tiepido 40 °C (105 °F), pensa alla temperatura di un bagno caldo
Istruzioni
- Preriscaldare il forno a 200 °C (400 °F), preferibilmente in modalità ventilata.
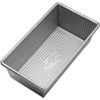
- Foderate uno stampo da plumcake di 9 x 5 cm con un foglio di carta da forno. Oliate leggermente la carta per evitare che il pane si attacchi allo stampo. Mettete da parte.
- Misurate con cura tutti gli ingredienti secchi, pesandoli per maggiore precisione, poiché le farine sono ricche di fibre e la mancanza di alcuni ingredienti renderà il pane umido.
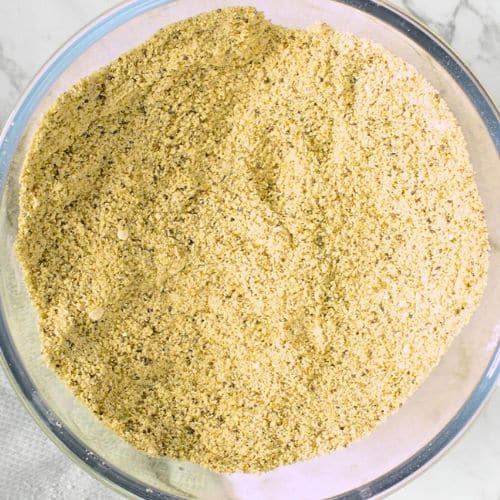
- In una grande ciotola, mescolare tutti gli ingredienti secchi. Non dovrebbe essere necessario più di 30 secondi.
- Aggiungete gli ingredienti liquidi e assicuratevi che l'acqua sia tiepida. Se è troppo fredda, le farine non si attiveranno bene e velocemente. Pensate a una temperatura da bagnomaria, intorno ai 40 °C/105 °F.
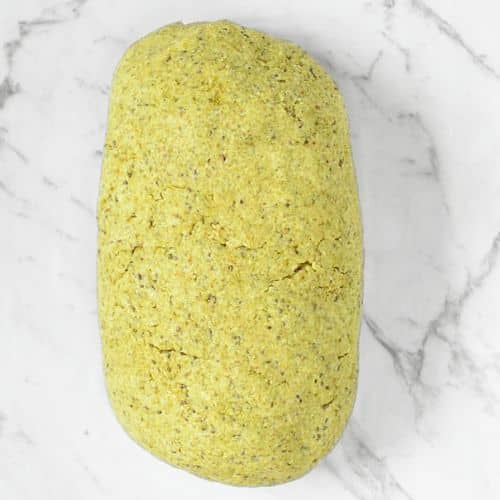
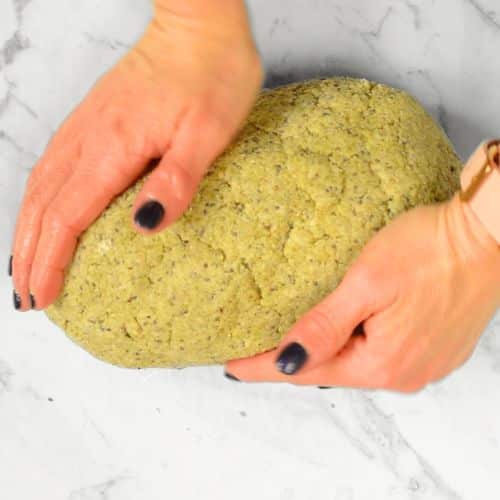
- Mescola prima con una spatola, poi impasta l'impasto con le mani per circa 1-2 minuti fino a formare una palla. L'impasto è leggermente appiccicoso, il che è normale, ma dovresti formare facilmente una palla di impasto. Se l'impasto si attacca alle mani dopo 2 minuti Impastando l'impasto, significa che hai bisogno di più crusca. Regola aggiungendo altra crusca, un cucchiaino alla volta, e impasta di nuovo. minuti 1. Puoi anche ungere leggermente le mani con olio (o inumidirle) per evitare che l'impasto si attacchi alle dita.
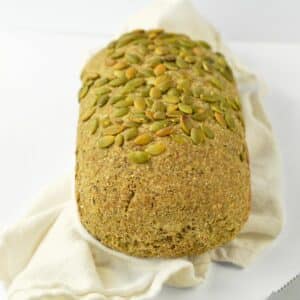
- Date all'impasto una bella forma cilindrica e arrotondata, senza appiattire la parte superiore, altrimenti il pane risulterà troppo denso. Il pane non lieviterà né si espanderà, dategli la forma che desiderate gli assaggi una volta sfornato.
- Bagna le mani con acqua e massaggia la superficie del pane per appianare eventuali crepe.
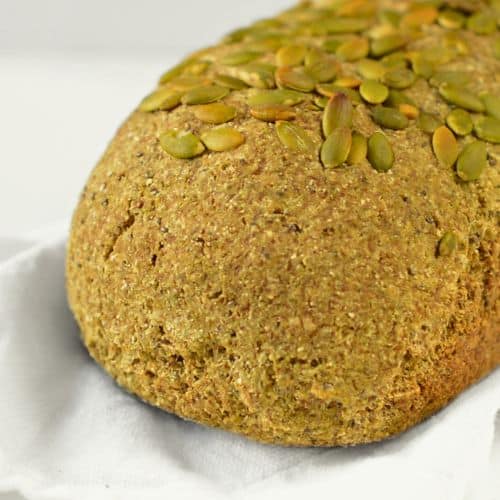
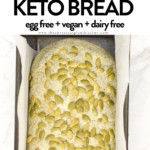
- Cospargete il pane con dei semi di zucca e premeteli leggermente per farli aderire alla superficie.
- Cuocere per 50 minuti, aggiungendo un foglio di alluminio sopra lo stampo da plumcake dopo 30 minuti per garantire che il pane cuocia perfettamente all'interno e che la parte superiore non si bruci.
- Dopo 50 minuti, inserite uno stecchino al centro del pane. Se esce pulito o con solo qualche briciola, è pronto. Altrimenti, continuate la cottura per altri 10 minuti, fino a un massimo di 70 minuti. Controllate la cottura ogni 10 minuti dopo i primi 50 minuti.
- Lascia raffreddare sulla griglia per 3 ore prima di affettare.
Come si mangia
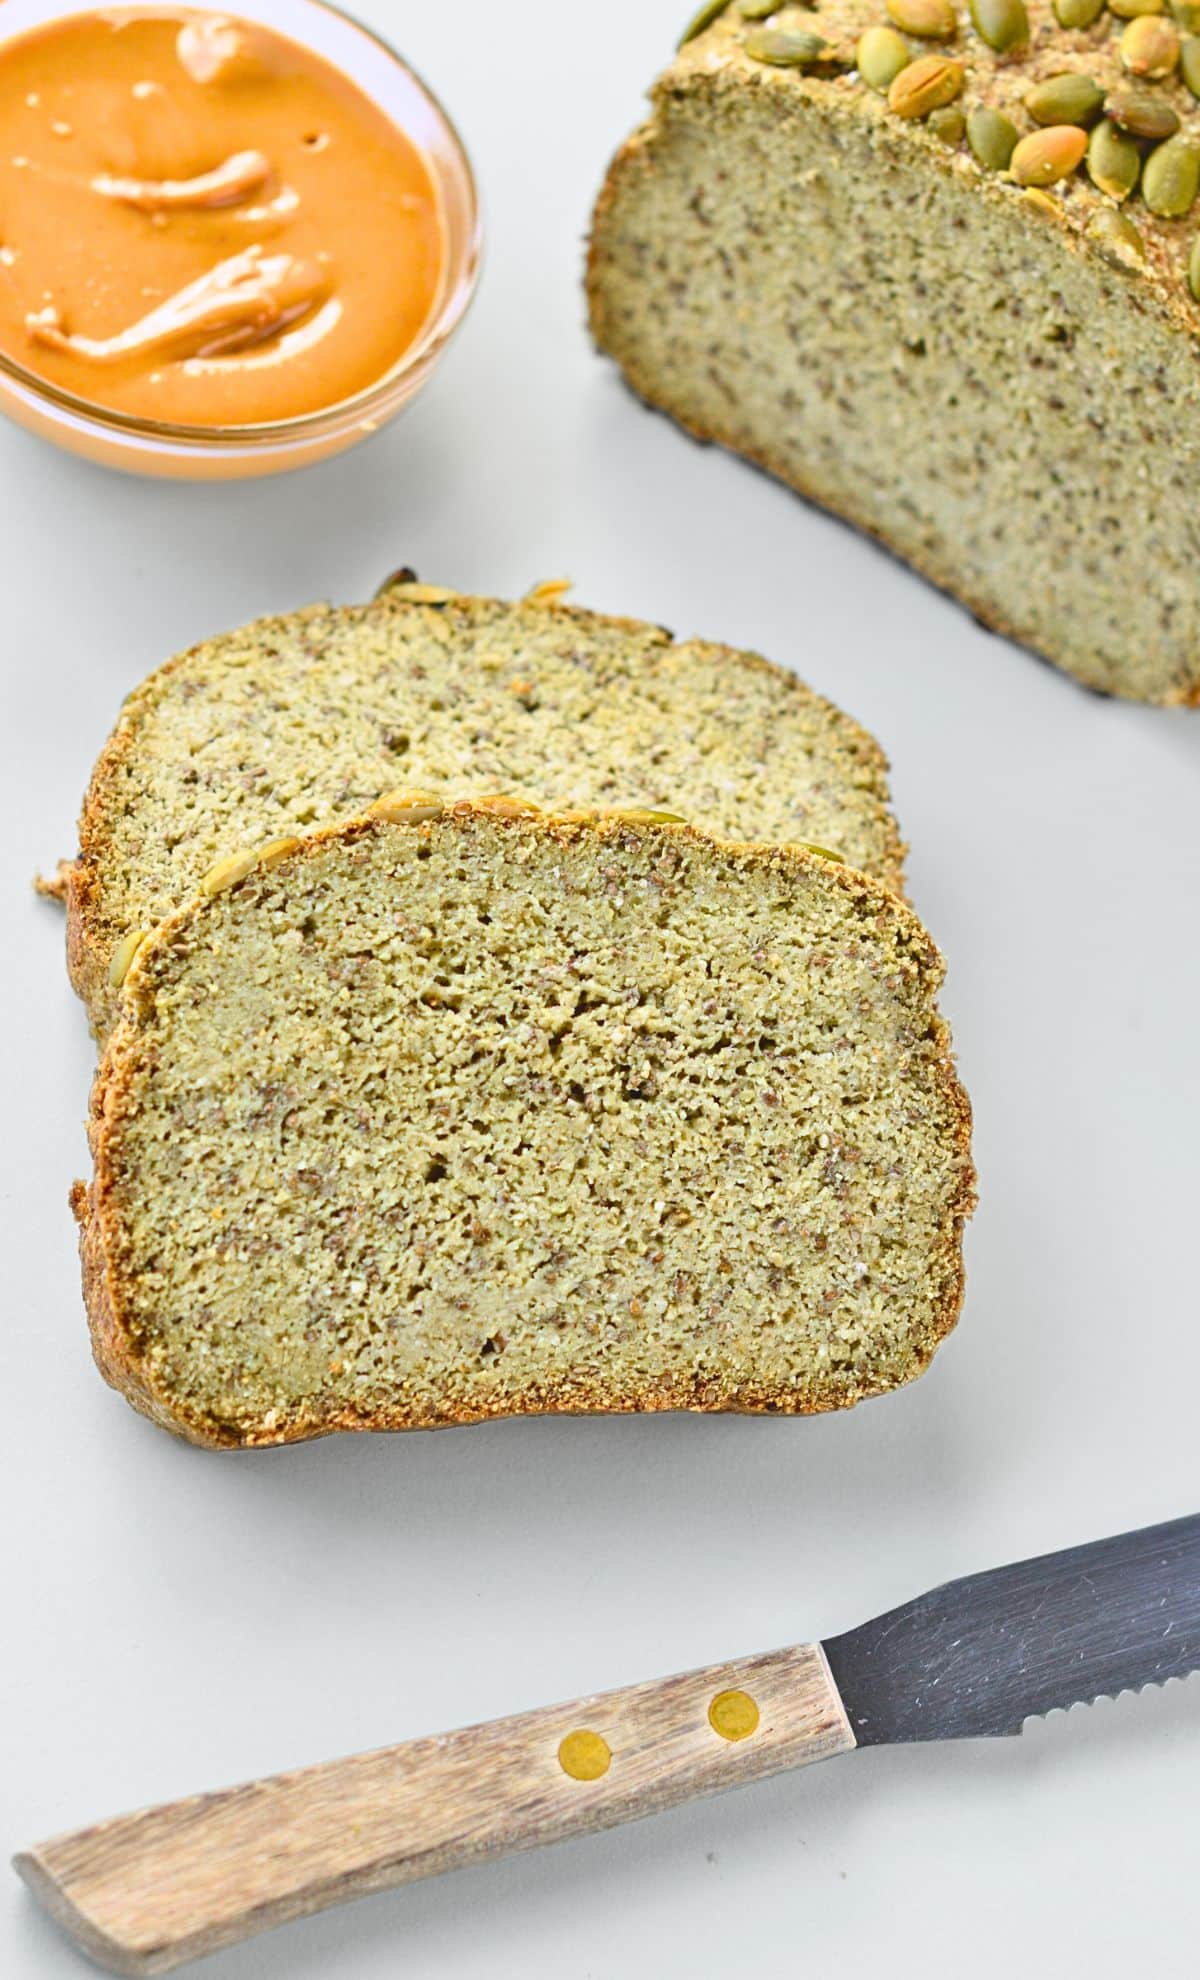
- Si tratta di un pane integrale tedesco dalla consistenza densa, che può risultare un po' umido al centro, e alcuni potrebbero preferire tostare ogni fetta prima di mangiarla.
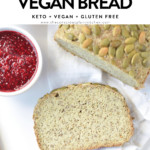
- Usalo come pane per sandwich o tostalo per la colazione con la tua crema spalmabile preferita, come burro di arachidi e marmellata di lamponi e semi di chia.
Archiviazione
- Conservare in dispensa fino a una settimana; avvolgere il pane in un canovaccio pulito e affettarlo al bisogno per mantenerlo fresco.
- Congelare le fette in un contenitore ermetico o in sacchetti con chiusura a zip. Scongelare in un tostapane o a temperatura ambiente per 2 ore, quindi tostare.
Note


Alimentazione
Ingredienti e sostituzioni
Continua a leggere per scoprire gli ingredienti necessari per preparare questa semplice ricetta di pane chetogenico senza lievito e senza glutine.
- Farina di mandorle – Per un risultato ottimale, utilizzare farina di mandorle fini sbiancate. In alternativa, si possono usare farina di semi di sesamo o farina di semi di girasole.
- Farina di zucca – Conosciuta anche come farina di semi di zucca. Se non la trovate al supermercato, potete ordinarla online o prepararla in casa. Mettete 3 tazze di semi di zucca in un frullatore e frullate fino a ottenere una polvere. Non frullate troppo a lungo, altrimenti si trasformerà in burro di zucca.
- noce di cocco Farina – Questa farina non può essere sostituita con un'altra.
- buccia di psillio macinata – Contiene principalmente fibre naturali. È un ingrediente fondamentale in questa ricetta per tenere insieme la farina senza glutine a basso contenuto di carboidrati. Non ometterlo né sostituirlo.
- I semi di Chia – semi di chia interi, neri o bianchi.
- Aceto di mele –Puoi usare qualsiasi acido, come succo di limone o aceto, a tua scelta. Questo aiuta ad attivare il lievito in polvere, dato che la ricetta non contiene glutine.
- Lievito in polvere – per far lievitare il pane.
Come preparare il pane vegano chetogenico
Questa ricetta di pane vegano e senza glutine è deliziosa e saziante, a basso contenuto di carboidrati, realizzata utilizzando solo farina nutriente a basso contenuto di carboidrati. Il risultato è un pane denso e saporito, simile al pane integrale tedesco.
- Preriscalda il forno a 200 °C (400 °F), selezionando la modalità ventilata se disponibile. Fodera uno stampo da plumcake di 9 x 5 cm con carta da forno, assicurandoti di ungere leggermente la carta per evitare che il pane si attacchi. Metti da parte.
- Misurate con precisione tutti gli ingredienti secchi; per una maggiore accuratezza, pesateli, soprattutto perché le farine sono ricche di fibre e delle imprecisioni potrebbero rendere il pane troppo umido.
- In una ciotola capiente, mescolate con una frusta tutti gli ingredienti secchi, un'operazione che non deve superare i 30 secondi.
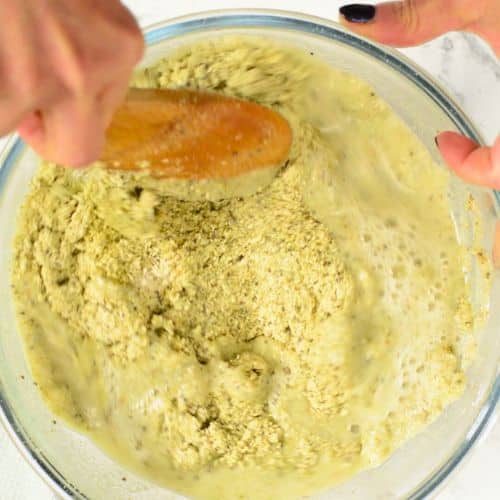
- Aggiungete gli ingredienti liquidi nella ciotola, assicurandovi che l'acqua sia tiepida per un'attivazione ottimale delle farine. La temperatura ideale è simile a quella di un bagno caldo, circa 40 °C. Iniziate a mescolare con una spatola, poi impastate con le mani per 1-2 minuti fino a ottenere un impasto omogeneo. L'impasto potrebbe risultare leggermente appiccicoso, il che è normale. Se dopo 2 minuti l'impasto si attacca eccessivamente, incorporate gradualmente altra crusca, aggiungendone un cucchiaino alla volta. In alternativa, ungete leggermente le mani con olio o inumiditele per evitare che si attacchi.
- Modellate l'impasto a forma di cilindro senza appiattire la parte superiore, poiché il pane non lievita né si espande durante la cottura. Date al pane la forma finale desiderata.
- Inumidisci le mani con acqua e massaggia la superficie del pane per eliminare eventuali crepe. Cospargi la superficie del pane con i semi di zucca, premendoli delicatamente per farli aderire.

- Cuocete in forno per 50 minuti, coprendo lo stampo da plumcake con un foglio di alluminio dopo 30 minuti per evitare che si bruci troppo e garantire una cottura uniforme.
- Dopo 50 minuti, verificate la cottura del pane inserendo uno stecchino al centro. Se esce pulito o con solo qualche briciola, il pane è pronto. Se necessario, continuate la cottura per altri 10 minuti, fino a un massimo di 70 minuti.
- Dopo i primi 50 minuti, controllate la cottura ogni 10 minuti.
- Lasciate raffreddare il pane su una griglia per 3 ore prima di affettarlo.
Suggerimento: sperimenta con condimenti o aromi aggiuntivi per personalizzare il pane secondo i tuoi gusti.
Suggerimenti per servire
Questo è un pane molto denso, migliore tostato. Consiglio di tagliarlo a fette sottili, tostarlo in pochi minuti e spalmarci sopra burro di arachidi e marmellata per bambini sopra. In alternativa, usatelo come pane per sandwich con avocado schiacciato e verdure crude a vostra scelta.
Altre ricette vegane chetogeniche
Questo blog parla di ricette vegane, ma mi piace condividere anche alcune ricette vegane chetogeniche, visto che tutti desideriamo ridurre il consumo di carboidrati. Se vi piace provare ricette vegane chetogeniche di tanto in tanto, ecco cosa vi consiglio di fare.


OMG! This bread is so delicious. I used cup measurement and was freaking out a bit when I read the comments after, but it turned out perfect.
The dough was moist and I formed the bread very quick and tried not to press it. I ate it with curried tofu tonight. Can’t wait to try your other recipes.
I am making this bread right now. I only see cup measurements. Where are the weight measurements? I really hope it turns out. This is perfect for a vegan diabetic.
Click on the metric button before the ingredients list to convert all the recipe card automatically into grams/oz. Enjoy the bread recipe, XOXO Carine
Thank you so much for the beautful comment! I can’t wait to see which recipe you are trying next. Enjoy! XOXO Carine.
Delicious! Easy to make. recipe easy to follow. My husband loved it. Thank You
I am so happy he loved the bread! Thanks for this beautiful feedback. XOXO Carine
I loved this recipe! I added my own little twist that I think a lot of people would enjoy:
I added home made vegan “parmesan”, which is just ground hemp seeds, nutritional yeast, and sea salt. I also added a little thyme, sage, Italian seasoning, and dried shallot/chive mix into the dough and I sprinkled some trader joes “everything but the bagel” seasoning on top!
Also, instead of 2 cups of water, i did 1.75 cups of water and .25 cups of unsweet coconut yogurt to make it taste a little more sour! It is amazing! Thank you for this recipe!!!
Thanks so much for sharing this ! It sounds delicious and I am sure many of us will give it a go. Enjoy the recipes on the blog, XOXO Carine
I have this in the oven now! I was quite surprised by the inconsistency if your cup measurements vs the weight… the right weight of pumpkin flour was closer to 1 1/2 cups, and for that weight of psyllium husk would have been about three times the cup amount! So, I did a little from column A and a little from column B and crossed my fingers! So, we’ll see what happens. Also, I had to change the almond flour (dietary issues) for other flour (I went with a combo of buckwheat and white rice flours)
Hi, The weight is correct for all flours. If you have some big difference it means that your flours are way thinner/less coarse than mine. That is why I always recommend to make the recipe in weight for precision and not in cups! Cups are volume and therefore they are precise for liquid but not for flours, especially low carb flours that are ground in very different level regarding country compred to wheat flour that has a similar granulomatery everywehre. Note that buckwheat flour and rice flour are heavy flour and replacing almond flour by this combo will create a very dense bread. I hope the bread turn out well, XOXO Carine.
Can you replace chia seeds with something else?
Probably flaxseed will work yes! I didnt try but they have similar properties. Enjoy ! XOXO Carine.
I made this bread and it was delicious, 2 slices filled me up. The oil I had was vegetable oil but everything else I had. It did not rise and it came out with a dark color not like yours, I wonder what I did wrong?
Thanks so much for the lovely feedback! The darker color may come from a darker pumpkin seed flour or some psyllium husk brand turns slightly blue/purple when baked. You can try a different brand of husk next time. Also not that this bread has no gluten and therefore it doesn’t raise much. I recommend you knead the dough gently. don’t press your loaf into the pan and shape it round and bumpy to keep as much air as possible inside. It will get the bread much lighter. Enjoy ! XOXO Carine.
OMG Grazie
I’ve been gluten free for 4 years and dairy free for about 2. Not a choice but a health necessity. I’ve tried so many recipes to make bread – I live in a country where gluten free and dairy free is not an understood concept. So everything I eat has to be made fro scratch day after day.
I stumbled across your recipe, and half heartedly gave it a go – knowing how disappointing most of my attempts are. But OMG OMG! This actually tastes like bread!!!! I mean, bread is fairly tasteless, as I remember, and this is bland – but I mean that in the most positive way ever!!! Most of the recipes I try have an overwhelming nut, or chickpea or eggy taste. But your bread is just perfect.. Yes, It’s dense and fairly wet, but compared to others, sooooooooooo much better. I’m actually looking to forward to my next meal when I can eat it!!!
GRAZIE
Hello! Welcome on my blog !I am so happy you enjoyed this gluten free vegan bread recipe. You may also like my gluten free dairy free wraps recipe. I can’t wait to read your next comment on the blog, XOXO Carine.
I made mine today and I’m so happy,it’s so yummy,thank you very much for posting this recipe!
My pleasure! I am so hapy for you and I can’t wait to read your next review on the blog. XOXO Carine.
I have not eaten bread for almost two years now because I am on an anti-inflammatory food plan. It has been a long and very bumpy ride to find a decent grain free, vegan bread that I rate so I was very interested to find this recipe without flaxseeds. I gave it a try and it is probably one of the easiest breads to make and also very tasty. I highly recommend you give it a try. It is so delicious as are the coconut pizza bases and her naan bread. Brilliant and yummy! What more could you ask for?! .
Thanks so much! XOXO Carine
I have made this bread today but it collapsed after I got it out of the oven. Any idea why that happened ? I do really like the taste of it anyway, just wished it looked prettier lol. Also the middle was kind of moist but I don’t mind that. I baked for 30 min, then covered it with foil then baked for 20 more minutes. After that the bread collapsed. I would appreciate any suggestions because I would love to make it again.
That looks like your psyllium husk is too thick and doesn’t absorb the moisture properly that is why it stay moist inside. If the dough is not moist, heavy before baking there is no reason it should deflate. Also, it can take up to 70 minutes to cook. I hope it gets cuter next time 🙂 XOXO Carine.