इन संतरे के स्कोन्स are fluffy, easy orange American scones made from fresh oranges, but with no eggs, no dairy and in 30 मिनट से कम.

I love making both British and American scones for breakfast. Their soft and slightly flaky texture is perfect with sweet spreads. My favorites are केले के स्कोन्स और कद्दू के स्कोन्स because they are the best combination of sweet, flavors, and crunch.
पूरी रेसिपी नीचे दी गई है, लेकिन नीचे दिए गए मेरे सभी टिप्स देखना न भूलें, जिनमें सामग्री के विकल्प, मेरे खाना पकाने के टिप्स और चरण-दर-चरण तस्वीरें शामिल हैं!
क्या आपको यह रेसिपी पसंद आई?
एक छोड़ दो टिप्पणी नीचे देखें या हमारे पेज पर जाएं Facebook पृष्ठ जहां मैं (लगभग) सभी टिप्पणियों का जवाब देता हूं, हमारा Instagram पेज प्रेरणा के लिए, या हमारे Pinterest व्यंजनों को सहेजने के लिए!

संतरे के स्कोन्स
सामग्री
- 2 ¾ कप स्वंय बढ़ता आटा - (नोट 1)
- ½ कप नारंगी का जूस - from fresh oranges, including pulp (note 2)
- ½ कप पौधे आधारित दूध - (नोट 3)
- 2 चम्मच नारंगी का छिलका - from previous oranges (note 4)
- 2 बड़े चम्मच जैतून का तेल - (नोट 5)
ऐच्छिक
- ¼ कप ब्राउन शुगर - (नोट 6)
- 1 छोटी चम्मच वेनीला सत्र
- 1 छोटी चम्मच दालचीनी
Orange Glazing
- 1 छोटी चम्मच नारंगी का छिलका
- 1 बड़ा चमचा ताज़ा निचोड़ा हुआ संतरे का रस
- ½ कप पिसी चीनी
अनुदेश
- ओवन को 400°F (200°C) पर पहले से गरम कर लें। एक बड़ी बेकिंग शीट पर पार्चमेंट पेपर बिछा लें। उस पर कुकिंग ऑयल स्प्रे से हल्का सा तेल लगा लें और अलग रख दें।
- In a large mixing bowl, stir freshly squeezed orange juice (keep the pulp for more flavors and fiber), self-rising flour, olive oil, and dairy-free milk of choice. Add the brown sugar, vanilla extract, and cinnamon for flavor if you like.
- Use a rubber spatula to stir and combine the ingredients, then knead with your hands to form a dough ball. If the dough is too sticky, add a little more flour; if it's too dry, add a bit more orange juice or milk.
- Place the dough ball on a lightly floured surface and roll it into a thick 8-inch dish.
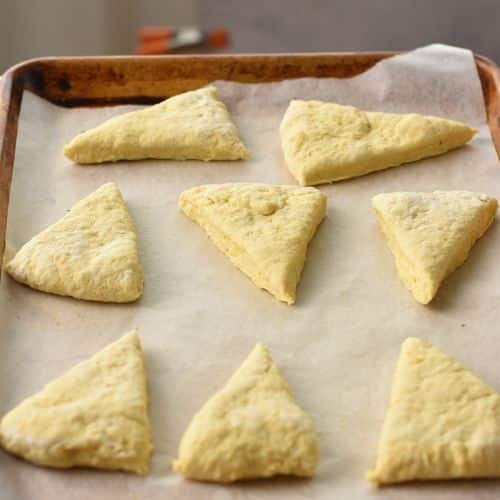
- Use a sharp knife to divide the disc into 8 even triangles.
- Spread the triangles and place them on the prepared baking sheet, leaving a thumb of space between each as they expand in the oven.
- इनके रंग को और भी निखारने के लिए ऊपर से थोड़ा सा दूध रहित ब्रश करें।
- Bake the scones at 400°F (200°C) on the center rack for 20 minutes until golden, and let them cool down on a cooling rack at room temperature before glazing.
- To make the glazing, stir icing sugar, orange juice, and orange zest until it forms a thick, creamy paste. Add more icing sugar if too thin or more juice if too thick.
- Drizzle on top of the cooled scones and extra freshly grated orange zest before serving.
नोट्स
पोषण
सामग्री और प्रतिस्थापन
- स्वंय बढ़ता आटा – सर्वोत्तम परिणामों के लिए अच्छी गुणवत्ता वाले सेल्फ-राइजिंग आटे का प्रयोग करें। घर पर बनाने के लिए, निर्देशों के अनुसार मैदा को बेकिंग पाउडर के साथ मिलाएं। ग्लूटेन-मुक्त विकल्प के लिए, मेरी बताई गई विधि का उपयोग करें। ग्लूटेन-मुक्त कनवर्टर, लेकिन बेकिंग पाउडर डालना न भूलें।
- नारंगी का जूस – Freshly squeezed juice with pulp provides the best flavor, but store-bought works in a pinch. For variety, try blood oranges or a mix of orange and tangerine juice.
- पौधे आधारित दूध – Any unsweetened non-dairy milk works. Soy, oat, or almond milk are great choices. Coconut milk can add richness but may slightly alter the flavor.
- नारंगी का छिलका – Use organic, untreated oranges for zesting. If unavailable, orange extract can provide a similar flavor boost.
- जैतून का तेल – Light olive oil works best. Alternatives include melted coconut oil or any neutral-flavored vegetable oil.
How to Make Orange Scones
It’s a really easy recipe to make with my recipe card further down, but I’ve included below pictures of key steps.
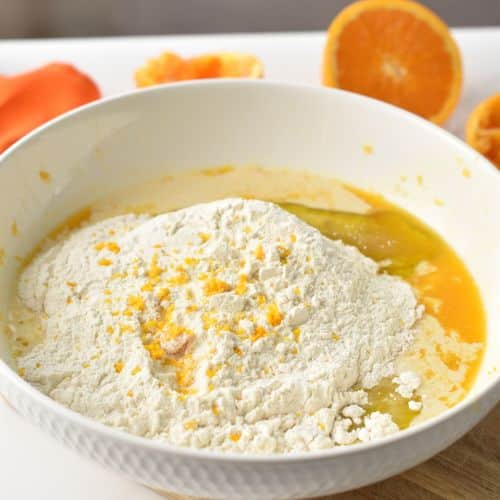
Combine the scone ingredients in a mixing bowl.
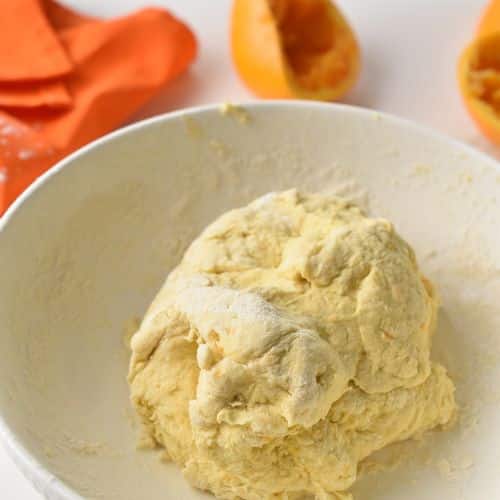
Knead the batter just enough so it forms a ball, but don’t over-mix it.
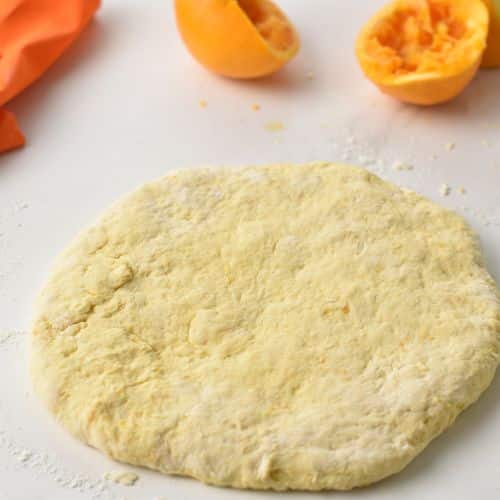
Use your hands to flatten it into an 8-inch disc.
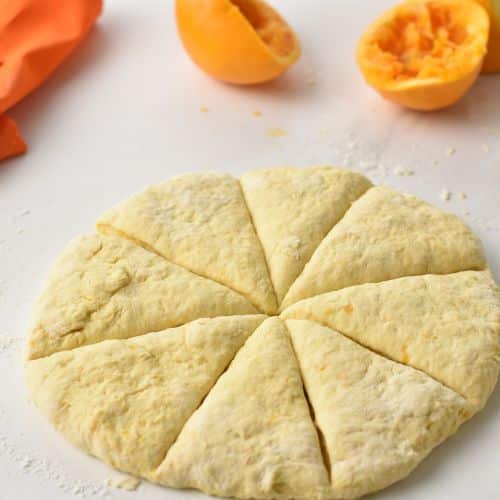
Cut the disc into 8 equal triangles.
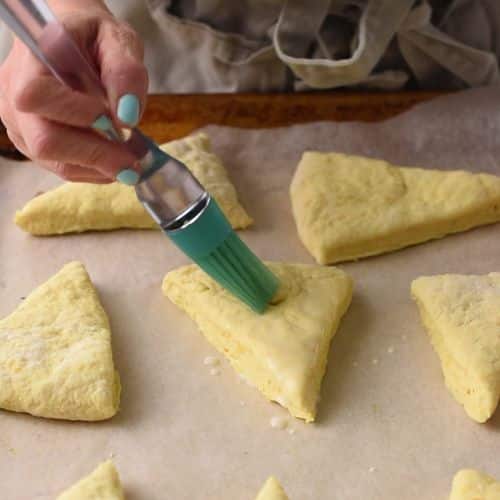
Brush some plant-based milk on the orange scones.
Bake the scones for 20 minutes at 400 °F (200 °C).
कैरीन के बेकिंग टिप्स
I’ve included below a few tips beyond all the info in the recipe card that will guarantee perfect scones.
- ठंडी सामग्री – Use cold plant-based milk and orange juice for flakier scones.
- न्यूनतम मिश्रण – सख्त स्कोन्स से बचने के लिए आटे को जितना हो सके कम छुएं।
- उचित आकार देना – Roll the dough to an even thickness for uniform baking.
- काटने की तकनीक – Use a sharp knife and press straight down without sawing for clean cuts.
- अंतर – बेकिंग शीट पर स्कोन्स के बीच पर्याप्त जगह छोड़ें ताकि वे समान रूप से भूरे हो सकें।
- उत्तेजकता – Mix the orange zest with the sugar (if using) before adding to the dough to release more oils and flavor.
- ग्लेज़िंग – Allow scones to cool completely before glazing to prevent the glaze from melting.
- भंडारण – Keep unglazed scones in an airtight container at room temperature for up to 2 days, or freeze for longer storage.

और भी स्कोन रेसिपी
If you like scones, you’ll love these:


Thank you for sharing, loved the recipe
My pleasure! Thanks for baking with me
Delicious! Although, I had to sprinkle some salt on it to give it some kick. Besides that it came out nice and crispy on the outside and moist and fluffy on the inside. Thanks for sharing. nature photo prints
They came out beautifully Thank you!
These came out packy, not light or fluffy. Not sure what I did wrong.
It can happen if you over-mixed, used flour without baking powder, used old flour (or old baking powder), measured the flour after pressing it in a cup, or even if the oven isn’t well calibrated.
Thanks for responding. I’m not too sure. Will try again. I want to try other flavors too.
Just made them. They look really good, although not as fluffy looking as yours. They smell even better. I haven’t tried them yet and I’m afraid they’re going to be overly sweet, but we’ll see in the morning.
Easy and delicious! I love your recipes!
धन्यवाद!!
These were great! I added some extra zest and cinnamon, and found it didn’t need the sugar. I added lots of dates, baked for 15 mins and they were light, fluffy and delicious!! Will definitely make again.
यह नुस्खा साझा करने के लिए धन्यवाद!