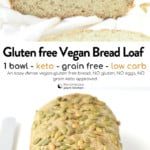
यह आसान है शाकाहारी कीटो ब्रेड रेसिपी यह एक सरल और स्वादिष्ट ब्रेड है जिसे बिना यीस्ट या ब्रेड मशीन के बनाया जाता है! साथ ही, यह एक लो-कार्ब कीटो ब्रेड रेसिपी है जिसमें केवल कुछ ही सामग्री का उपयोग किया जाता है। 2.2 ग्राम शुद्ध कार्ब्स प्रति स्लाइस!
मैं कई सालों से कीटो डाइट फॉलो कर रही हूं, और अपने शाकाहारी पति के लिए शाकाहारी ब्रेड बनाना मेरा शौक है। जई के आटे की रोटी, वीगन ग्लूटेन-फ्री ब्रेडया, दो सामग्री से बनने वाली फ्लैटब्रेडऔर अगर मुझे जल्दी है, तो मैं अपना दो सामग्री से बनी ब्रेड.
आपने शायद मेरी कुछ कीटो ब्रेड्स ट्राई की होंगी। शहद जैसा मीठालेकिन जैसा कि आप जानते हैं, उन्हें ज्यादातर समय अंडों की आवश्यकता होती है।
क्या आपको यह रेसिपी पसंद आई?
एक छोड़ दो टिप्पणी नीचे देखें या हमारे पेज पर जाएं Facebook पृष्ठ जहां मैं (लगभग) सभी टिप्पणियों का जवाब देता हूं, हमारा Instagram पेज प्रेरणा के लिए, या हमारे Pinterest व्यंजनों को सहेजने के लिए!
वीगन कीटो ब्रेड
सामग्री
- 1 कप बादाम का आटा
- 1 कप कद्दू का आटा - अपना खुद का बनाने के लिए नोट देखें
- ½ कप नारियल का आटा
- ⅓ कप पिसी हुई साइलियम भूसी
- ¼ कप चिया बीज
- 1 बड़ा चमचा बेकिंग पाउडर
- 1 छोटी चम्मच नमक
तरल सामग्री
- 2 बड़े चम्मच अंगूर के बीज का तेल - या जैतून का तेल, बादाम का तेल
- 1 छोटी चम्मच सेब का सिरका - या नींबू का रस
- 2 कप पानी - गुनगुना 40°C (105°F), गर्म पानी से नहाने के तापमान के बराबर।
अनुदेश
- ओवन को 400°F (200°C) पर पहले से गरम कर लें, अधिमानतः फैन-बेक मोड पर।
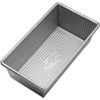
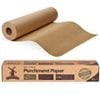
- एक 9 इंच x 5 इंच के ब्रेड पैन में पार्चमेंट पेपर बिछा दें। पेपर पर हल्का सा तेल लगा दें ताकि ब्रेड पैन से चिपके नहीं। इसे अलग रख दें।
- सभी सूखी सामग्रियों को सावधानीपूर्वक मापें, सटीक माप के लिए उन्हें तौलें क्योंकि आटे में फाइबर की मात्रा अधिक होती है, और किसी भी मात्रा को कम मापने से ब्रेड गीली हो जाएगी।
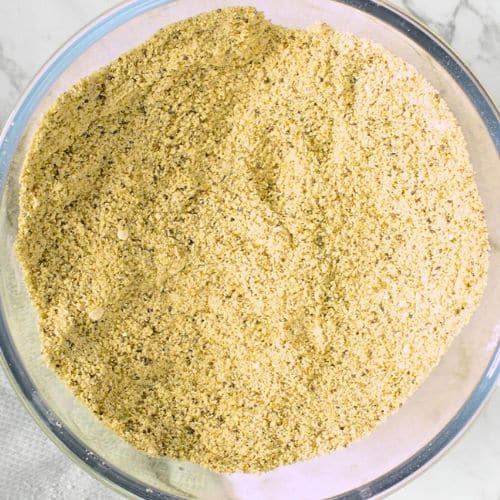
- एक बड़े कटोरे में, सभी सूखी सामग्री को एक साथ फेंट लें। इसमें इससे ज्यादा समय नहीं लगना चाहिए। 30 सेकंड.
- तरल सामग्री डालकर अच्छी तरह मिलाएँ, ध्यान रहे कि पानी गुनगुना हो। यदि पानी बहुत ठंडा होगा, तो आटा उतनी अच्छी तरह और उतनी जल्दी सक्रिय नहीं होगा। पानी का तापमान लगभग 40°C/105°F होना चाहिए, यानी गर्म पानी से नहाने के लिए उपयुक्त।
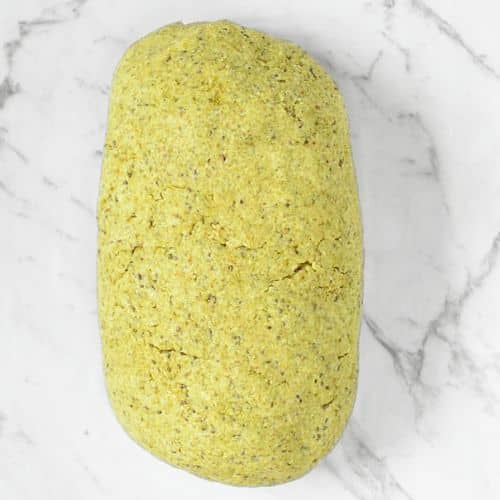
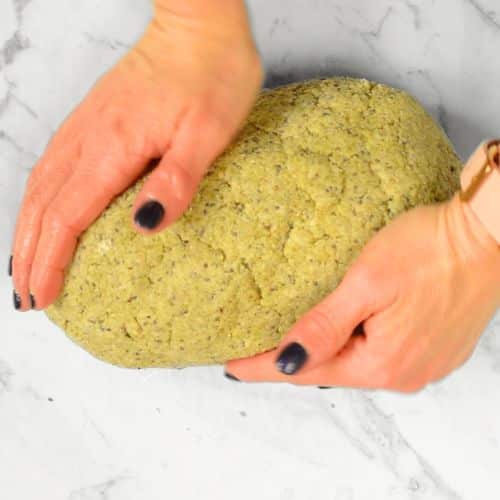
- पहले स्पैचुला से चलाएँ, फिर आटे को हाथों से लगभग गूंध लें। 1-2 मिनट जब तक यह एक गेंद के आकार में इकट्ठा न हो जाए। आटा थोड़ा चिपचिपा होता है, जो सामान्य है, लेकिन आपको आसानी से आटे की गेंद बनानी चाहिए। अगर आटा आपके हाथों से चिपकता है तो... 2 मिनट आटा गूंथते समय, अगर आपको और भूसी की ज़रूरत है, तो थोड़ा-थोड़ा करके भूसी छिड़कें और फिर से गूंथ लें। भूसी की मात्रा को एक-एक चम्मच करके बढ़ाते जाएं और फिर से गूंथ लें। 1 मिनटआप अपने हाथों को हल्का सा तेल (या गीला) भी कर सकते हैं ताकि आटा आपकी उंगलियों पर चिपके नहीं।
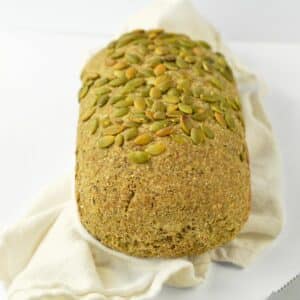
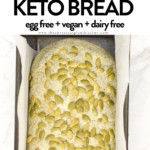
- एक सुंदर गोल बेलनाकार आकार दें, ऊपर से चपटा न करें, अन्यथा रोटी बहुत घनी हो जाएगी। रोटी फूलेगी या फैलेगी नहीं, ओवन से निकालने के बाद आप इसे जैसा आकार देना चाहते हैं, वैसा ही दें।
- अपने हाथों को पानी से गीला करें और ब्रेड के ऊपरी हिस्से को हल्के हाथों से दबाकर दरारों को चिकना करें।
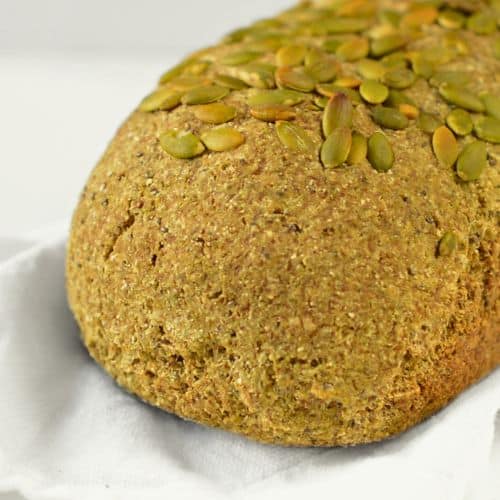
- ब्रेड के ऊपर थोड़े से कद्दू के बीज छिड़कें और उन्हें ब्रेड की सतह पर चिपकाने के लिए हल्का सा दबाएं।
- के लिए पकाया 50 मिनट30 मिनट बाद ब्रेड पैन के ऊपर एल्यूमीनियम फॉयल का एक टुकड़ा लगा दें ताकि यह सुनिश्चित हो सके कि ब्रेड अंदर से पूरी तरह पक जाए और ऊपर से जले नहीं।
- 50 मिनट बाद, ब्रेड के बीच में एक सींक डालें। अगर सींक साफ निकले या उस पर कुछ टुकड़े लगे हों, तो ब्रेड तैयार है। अन्यथा, इसे 10 मिनट और पकाएँ, अधिकतम 70 मिनट तक। 50 मिनट के बाद हर 10 मिनट में बेकिंग की जाँच करते रहें।
- रैक पर ठंडा होने दें 3 घंटे टुकड़ा करने से पहले।
कैसे खाएं?
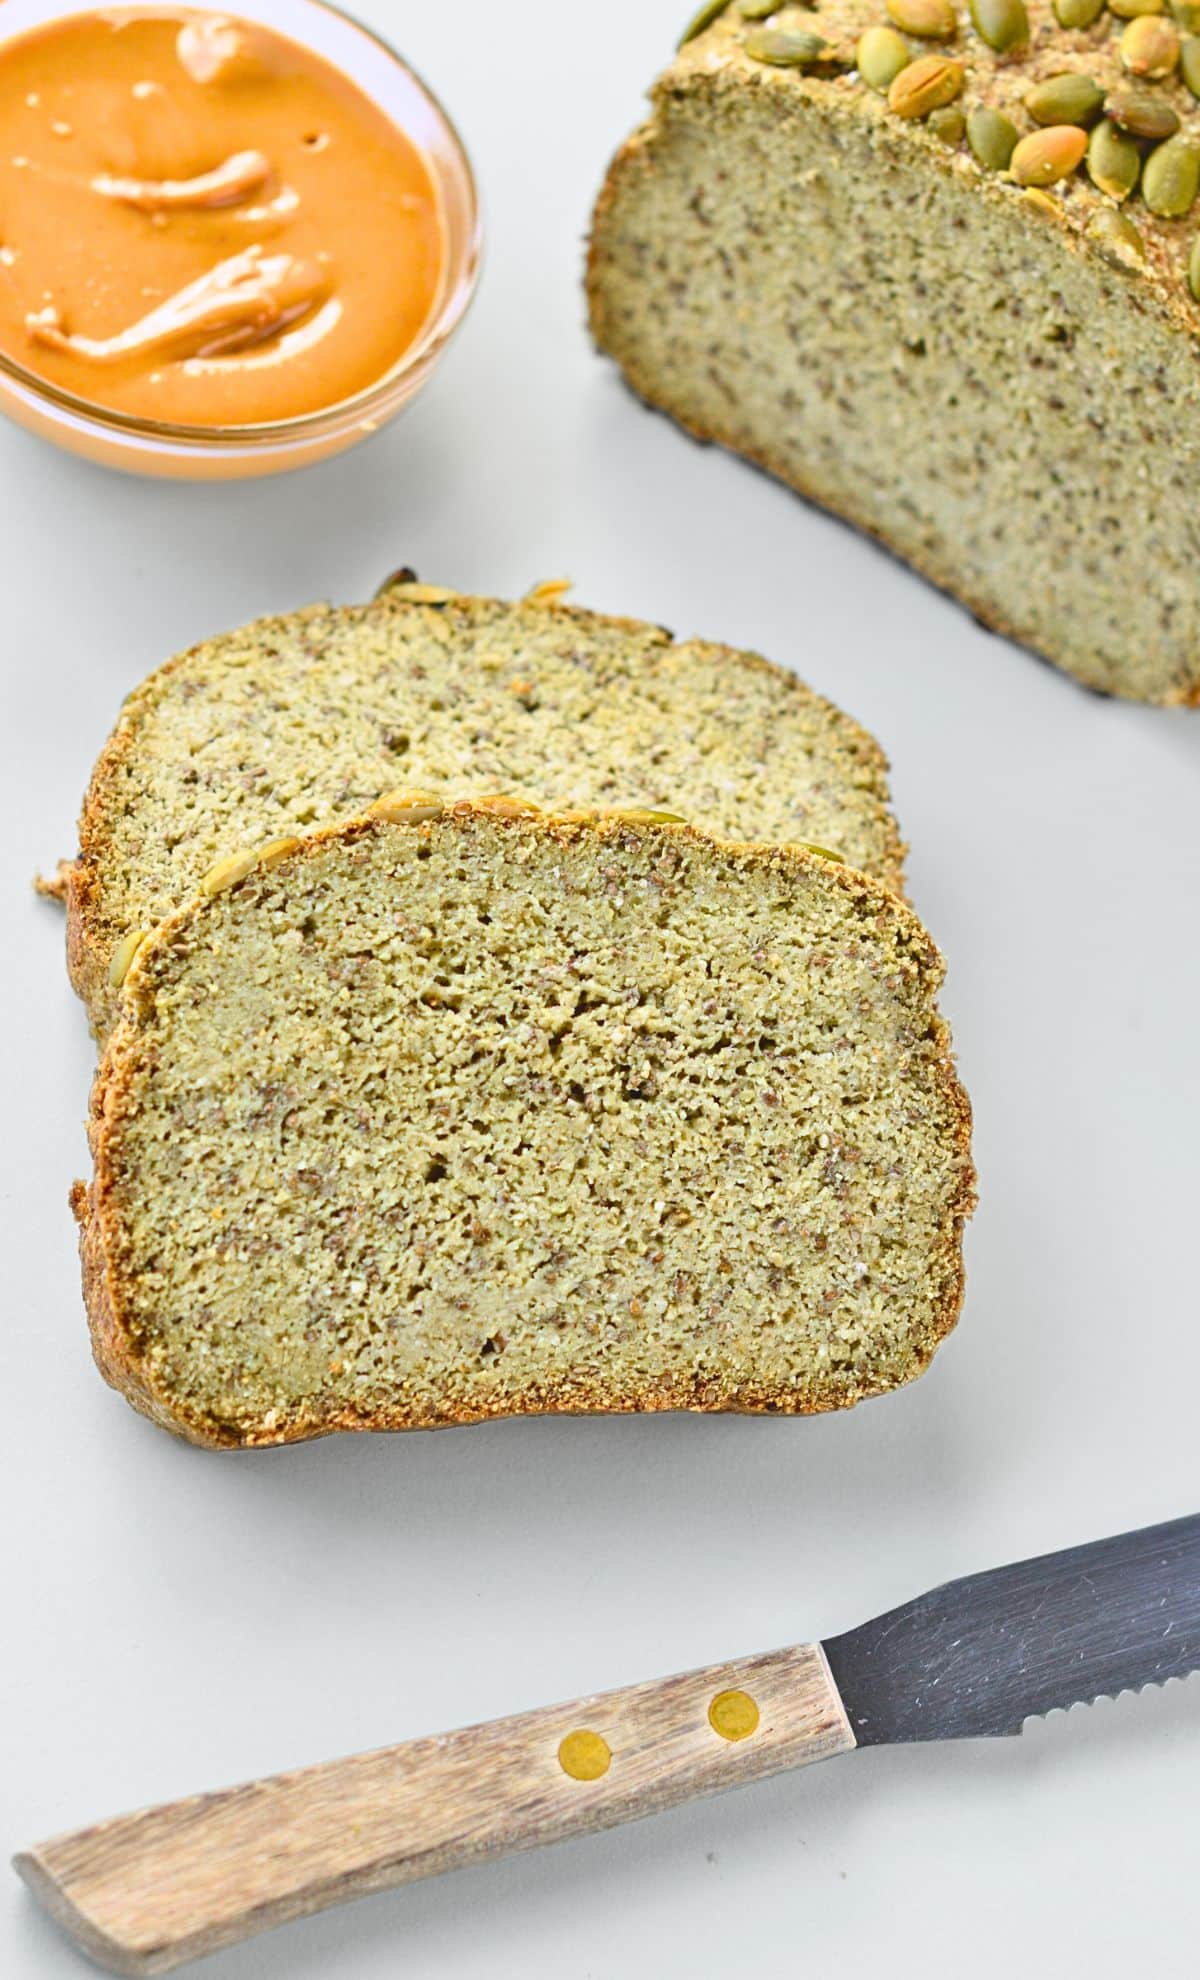
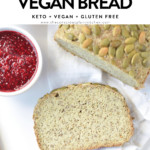
- यह एक घनी, ब्रेड जैसी जर्मन साबुत अनाज की ब्रेड है, यह बीच में थोड़ी नम हो सकती है, और कुछ लोग खाने से पहले प्रत्येक स्लाइस को टोस्ट करना पसंद कर सकते हैं।
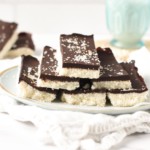
- इसे सैंडविच ब्रेड के रूप में या नाश्ते में टोस्ट के रूप में अपने पसंदीदा स्प्रेड जैसे पीनट बटर और चिया सीड रास्पबेरी जैम के साथ इस्तेमाल करें।
भंडारण
- इसे पेंट्री में 1 सप्ताह तक स्टोर करके रखें, ब्रेड को एक साफ किचन टॉवल में लपेटें और जरूरत पड़ने पर ही काटें ताकि ब्रेड ताजा बनी रहे।
- कटे हुए टुकड़ों को एयरटाइट बॉक्स या ज़िप लॉक बैग में डालकर फ्रीज़ करें। टोस्टर में या कमरे के तापमान पर 2 घंटे के लिए डीफ़्रॉस्ट करें, फिर टोस्ट करें।
नोट्स


पोषण
सामग्री और प्रतिस्थापन
तो इस आसान यीस्ट-फ्री ग्लूटेन-फ्री कीटो ब्रेड रेसिपी को बनाने के लिए आवश्यक सामग्री जानने के लिए आगे पढ़ते रहें।
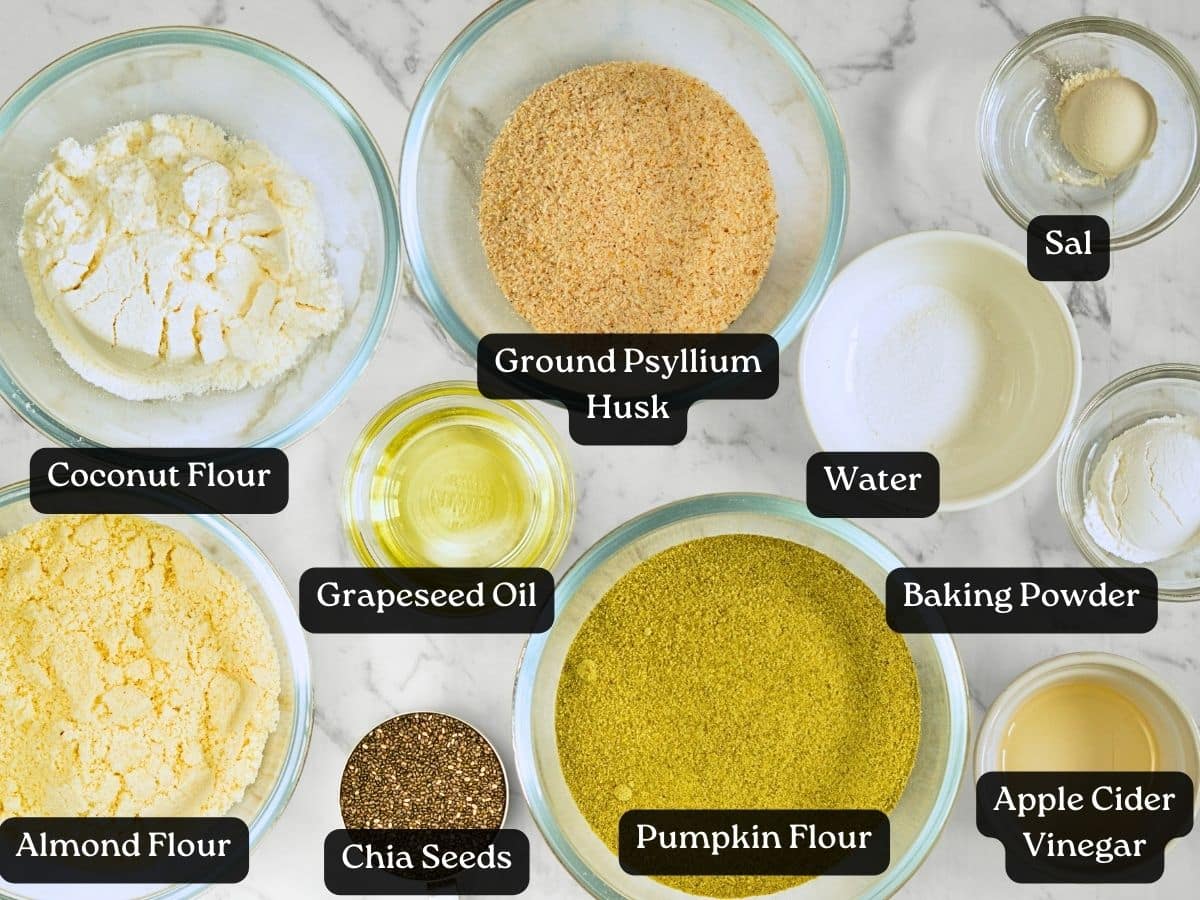
- बादाम का आटा सर्वोत्तम परिणाम के लिए बारीक उबले बादाम का आटा प्रयोग करें। आप इसके स्थान पर तिल का आटा या सूरजमुखी का आटा भी प्रयोग कर सकते हैं।
- कद्दू का आटा इसे कद्दू के बीज का पाउडर भी कहते हैं। अगर यह आपको अपने स्थानीय सुपरमार्केट में नहीं मिलता है, तो आप इसे ऑनलाइन ऑर्डर कर सकते हैं या घर पर ही बना सकते हैं। एक ब्लेंडर में 3 कप कद्दू के बीज डालें और पाउडर बनने तक ब्लेंड करें। ज़्यादा ब्लेंड न करें, वरना यह कद्दू का मक्खन बन जाएगा।
- नारियल का आटा – इसे किसी अन्य आटे से बदला नहीं जा सकता।
- पिसी हुई साइलियम भूसी – इसमें मुख्य रूप से प्राकृतिक फाइबर होता है। यह इस रेसिपी में कम कार्बोहाइड्रेट वाले ग्लूटेन-मुक्त आटे को बांधे रखने के लिए एक महत्वपूर्ण घटक है। इसे छोड़ें या बदलें नहीं।
- चिया बीज – काले या सफेद साबुत चिया बीज।
- सेब का सिरका -आप अपनी पसंद का कोई भी एसिड, जैसे नींबू का रस या सिरका, इस्तेमाल कर सकते हैं। इससे बेकिंग पाउडर को सक्रिय करने में मदद मिलती है क्योंकि इस रेसिपी में ग्लूटेन नहीं है।
- बेकिंग पाउडर – रोटी को थोड़ा फुलाने के लिए।
वीगन कीटो ब्रेड कैसे बनाएं
यह ग्लूटेन-मुक्त, शाकाहारी ब्रेड रेसिपी स्वादिष्ट और पौष्टिक लो-कार्ब ब्रेड है, जिसमें केवल पौष्टिक लो-कार्ब आटे का उपयोग किया गया है। यह जर्मन होल ग्रेन ब्रेड के समान एक स्वादिष्ट और घनी ब्रेड है।
- ओवन को 400°F (200°C) पर पहले से गरम कर लें, यदि उपलब्ध हो तो फैन-बेक मोड चुनें। 9 इंच x 5 इंच के लोफ पैन में पार्चमेंट पेपर बिछाएं, पेपर पर हल्का सा तेल लगाना न भूलें ताकि ब्रेड चिपके नहीं। इसे अलग रख दें।
- सभी सूखी सामग्रियों को सावधानीपूर्वक मापें, अधिक सटीकता के लिए उन्हें तौलकर मापें, विशेष रूप से क्योंकि आटे में फाइबर की मात्रा अधिक होती है, और माप में inaccuracies के कारण ब्रेड बहुत अधिक नम हो सकती है।
- एक बड़े मिक्सिंग बाउल में, सभी सूखी सामग्रियों को एक साथ फेंट लें, इस प्रक्रिया में 30 सेकंड से अधिक समय नहीं लगना चाहिए।
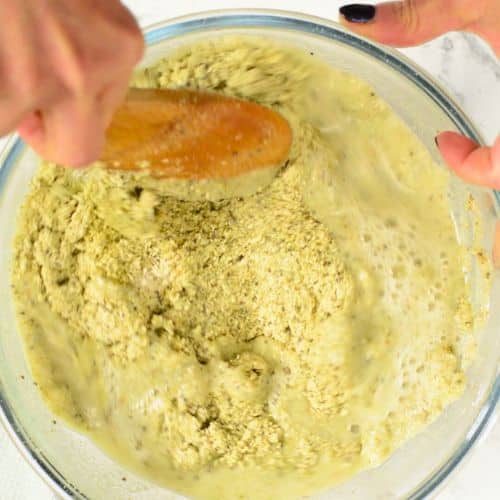
- कटोरे में तरल सामग्री डालें, ध्यान रहे कि पानी गुनगुना हो ताकि आटा अच्छी तरह से घुल जाए। पानी का तापमान लगभग 40°C/105°F होना चाहिए, जो गर्म पानी से नहाने के तापमान के बराबर हो। पहले चम्मच से चलाएँ, फिर हाथों से 1-2 मिनट तक गूंधें जब तक कि आटा एक बंधी हुई गेंद न बन जाए। आटा थोड़ा चिपचिपा हो सकता है, जो सामान्य है। अगर 2 मिनट बाद भी आटा बहुत ज्यादा चिपकता है, तो धीरे-धीरे थोड़ा-थोड़ा करके भूसी मिलाएँ, एक बार में एक चम्मच। या फिर, हाथों को हल्का सा तेल या पानी से गीला कर लें ताकि आटा चिपके नहीं।
- आटे को गोल बेलनाकार आकार दें, ऊपर से चपटा न करें, क्योंकि बेकिंग के दौरान ब्रेड फूलती या फैलती नहीं है। ब्रेड को मनचाहा अंतिम आकार दें।
- अपने हाथों को पानी से गीला करें और ब्रेड की ऊपरी सतह को हल्के हाथों से दबाकर दरारें ठीक करें। ब्रेड की सतह पर कद्दू के बीज छिड़कें और उन्हें हल्के से दबाकर चिपका दें।

- ब्रेड को 50 मिनट तक बेक करें, और 30 मिनट बाद पैन के ऊपर एल्यूमीनियम फॉयल का एक टुकड़ा रख दें ताकि वह ज्यादा भूरा न हो और साथ ही समान रूप से पक जाए।
- 50 मिनट बाद, बीच में एक सींक डालकर देखें कि ब्रेड पक गई है या नहीं। अगर सींक साफ निकले या उस पर कुछ टुकड़े लगे हों, तो ब्रेड तैयार है। ज़रूरत पड़ने पर, इसे 10 मिनट और पकाएँ, अधिकतम 70 मिनट तक।
- शुरुआती 50 मिनट के बाद हर 10 मिनट में बेकिंग की प्रगति पर नज़र रखें।
- ब्रेड को काटने से पहले उसे रैक पर 3 घंटे तक ठंडा होने दें।
सुझाव: अपनी पसंद के अनुसार ब्रेड को व्यक्तिगत रूप देने के लिए अतिरिक्त टॉपिंग या फ्लेवरिंग के साथ प्रयोग करें।
सुझाव देना
यह बहुत घनी ब्रेड है, इसे टोस्ट करके खाना बेहतर है। मैं पतले स्लाइस में काटकर, कुछ ही मिनटों में टोस्ट करने और उस पर पीनट बटर लगाने की सलाह देता हूँ। बेबी जैम ऊपर से डालें। अन्यथा, इसे मैश किए हुए एवोकाडो और अपनी पसंद की कच्ची सब्जियों के साथ सैंडविच ब्रेड के रूप में इस्तेमाल करें।
और भी शाकाहारी कीटो रेसिपी
यह ब्लॉग शाकाहारी व्यंजनों के बारे में है, लेकिन मैं कुछ शाकाहारी कीटो रेसिपी भी साझा करना पसंद करती हूँ क्योंकि हम सभी कम कार्बोहाइड्रेट खाना चाहते हैं। अगर आपको कभी-कभी शाकाहारी कीटो रेसिपी खाना पसंद है, तो मैं आपको ये रेसिपी आज़माने का सुझाव देती हूँ।


OMG! This bread is so delicious. I used cup measurement and was freaking out a bit when I read the comments after, but it turned out perfect.
The dough was moist and I formed the bread very quick and tried not to press it. I ate it with curried tofu tonight. Can’t wait to try your other recipes.
I am making this bread right now. I only see cup measurements. Where are the weight measurements? I really hope it turns out. This is perfect for a vegan diabetic.
Click on the metric button before the ingredients list to convert all the recipe card automatically into grams/oz. Enjoy the bread recipe, XOXO Carine
Thank you so much for the beautful comment! I can’t wait to see which recipe you are trying next. Enjoy! XOXO Carine.
Delicious! Easy to make. recipe easy to follow. My husband loved it. Thank You
I am so happy he loved the bread! Thanks for this beautiful feedback. XOXO Carine
I loved this recipe! I added my own little twist that I think a lot of people would enjoy:
I added home made vegan “parmesan”, which is just ground hemp seeds, nutritional yeast, and sea salt. I also added a little thyme, sage, Italian seasoning, and dried shallot/chive mix into the dough and I sprinkled some trader joes “everything but the bagel” seasoning on top!
Also, instead of 2 cups of water, i did 1.75 cups of water and .25 cups of unsweet coconut yogurt to make it taste a little more sour! It is amazing! Thank you for this recipe!!!
Thanks so much for sharing this ! It sounds delicious and I am sure many of us will give it a go. Enjoy the recipes on the blog, XOXO Carine
I have this in the oven now! I was quite surprised by the inconsistency if your cup measurements vs the weight… the right weight of pumpkin flour was closer to 1 1/2 cups, and for that weight of psyllium husk would have been about three times the cup amount! So, I did a little from column A and a little from column B and crossed my fingers! So, we’ll see what happens. Also, I had to change the almond flour (dietary issues) for other flour (I went with a combo of buckwheat and white rice flours)
Hi, The weight is correct for all flours. If you have some big difference it means that your flours are way thinner/less coarse than mine. That is why I always recommend to make the recipe in weight for precision and not in cups! Cups are volume and therefore they are precise for liquid but not for flours, especially low carb flours that are ground in very different level regarding country compred to wheat flour that has a similar granulomatery everywehre. Note that buckwheat flour and rice flour are heavy flour and replacing almond flour by this combo will create a very dense bread. I hope the bread turn out well, XOXO Carine.
Can you replace chia seeds with something else?
Probably flaxseed will work yes! I didnt try but they have similar properties. Enjoy ! XOXO Carine.
I made this bread and it was delicious, 2 slices filled me up. The oil I had was vegetable oil but everything else I had. It did not rise and it came out with a dark color not like yours, I wonder what I did wrong?
Thanks so much for the lovely feedback! The darker color may come from a darker pumpkin seed flour or some psyllium husk brand turns slightly blue/purple when baked. You can try a different brand of husk next time. Also not that this bread has no gluten and therefore it doesn’t raise much. I recommend you knead the dough gently. don’t press your loaf into the pan and shape it round and bumpy to keep as much air as possible inside. It will get the bread much lighter. Enjoy ! XOXO Carine.
हे भगवान् धन्यवाद
I’ve been gluten free for 4 years and dairy free for about 2. Not a choice but a health necessity. I’ve tried so many recipes to make bread – I live in a country where gluten free and dairy free is not an understood concept. So everything I eat has to be made fro scratch day after day.
I stumbled across your recipe, and half heartedly gave it a go – knowing how disappointing most of my attempts are. But OMG OMG! This actually tastes like bread!!!! I mean, bread is fairly tasteless, as I remember, and this is bland – but I mean that in the most positive way ever!!! Most of the recipes I try have an overwhelming nut, or chickpea or eggy taste. But your bread is just perfect.. Yes, It’s dense and fairly wet, but compared to others, sooooooooooo much better. I’m actually looking to forward to my next meal when I can eat it!!!
धन्यवाद
Hello! Welcome on my blog !I am so happy you enjoyed this gluten free vegan bread recipe. You may also like my gluten free dairy free wraps recipe. I can’t wait to read your next comment on the blog, XOXO Carine.
I made mine today and I’m so happy,it’s so yummy,thank you very much for posting this recipe!
My pleasure! I am so hapy for you and I can’t wait to read your next review on the blog. XOXO Carine.
I have not eaten bread for almost two years now because I am on an anti-inflammatory food plan. It has been a long and very bumpy ride to find a decent grain free, vegan bread that I rate so I was very interested to find this recipe without flaxseeds. I gave it a try and it is probably one of the easiest breads to make and also very tasty. I highly recommend you give it a try. It is so delicious as are the coconut pizza bases and her naan bread. Brilliant and yummy! What more could you ask for?! .
Thanks so much! XOXO Carine
I have made this bread today but it collapsed after I got it out of the oven. Any idea why that happened ? I do really like the taste of it anyway, just wished it looked prettier lol. Also the middle was kind of moist but I don’t mind that. I baked for 30 min, then covered it with foil then baked for 20 more minutes. After that the bread collapsed. I would appreciate any suggestions because I would love to make it again.
That looks like your psyllium husk is too thick and doesn’t absorb the moisture properly that is why it stay moist inside. If the dough is not moist, heavy before baking there is no reason it should deflate. Also, it can take up to 70 minutes to cook. I hope it gets cuter next time 🙂 XOXO Carine.