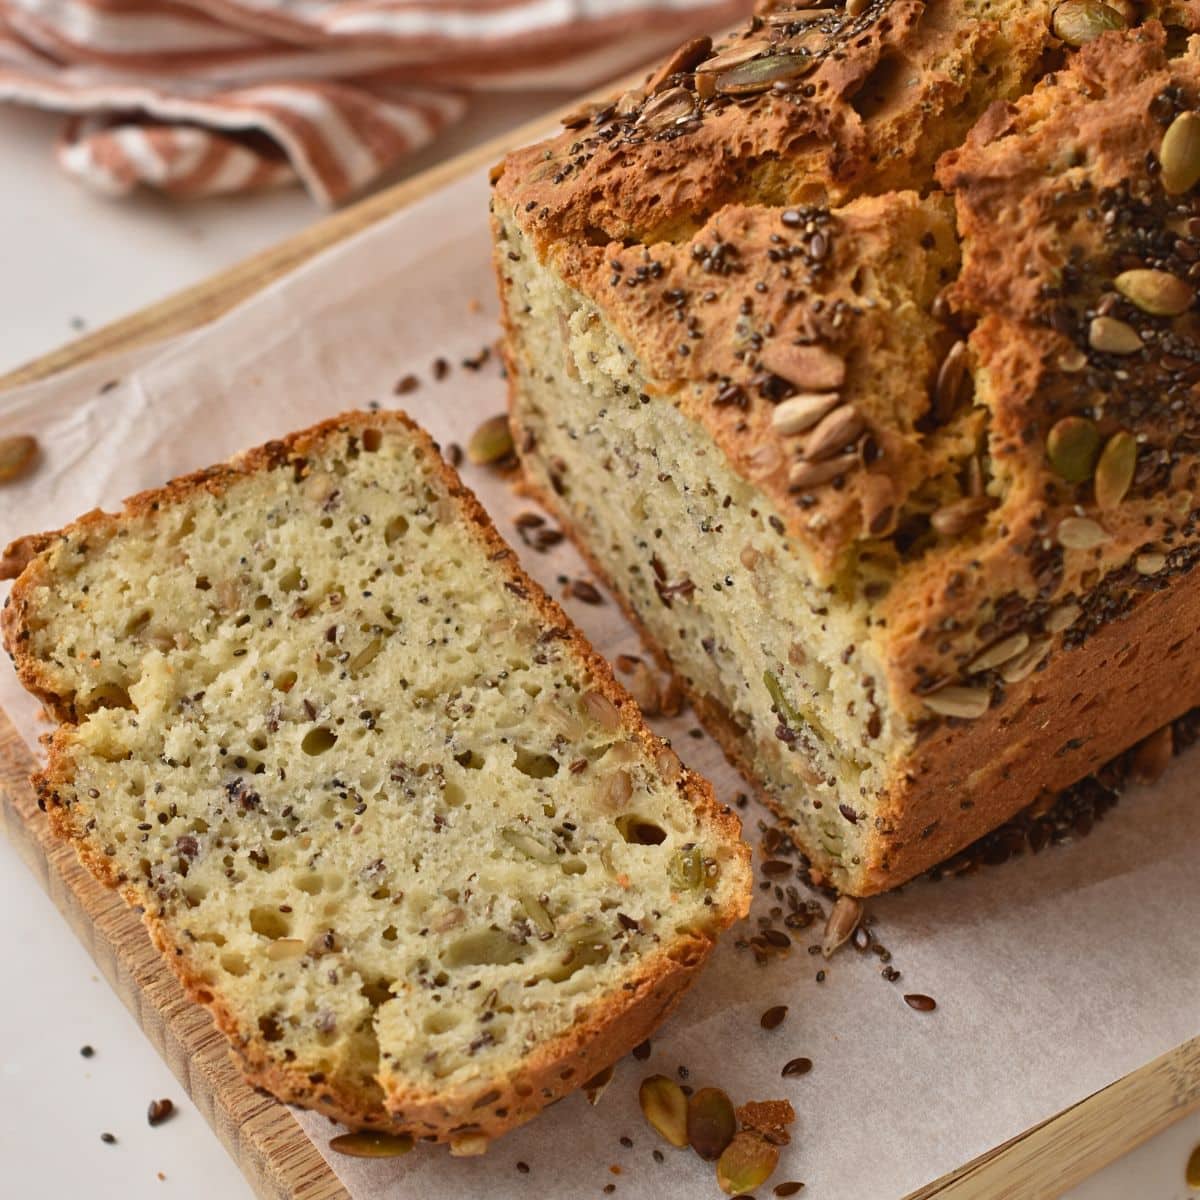
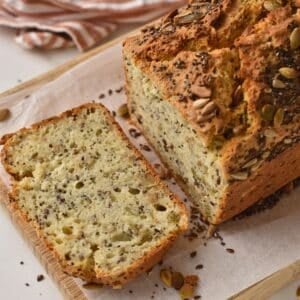
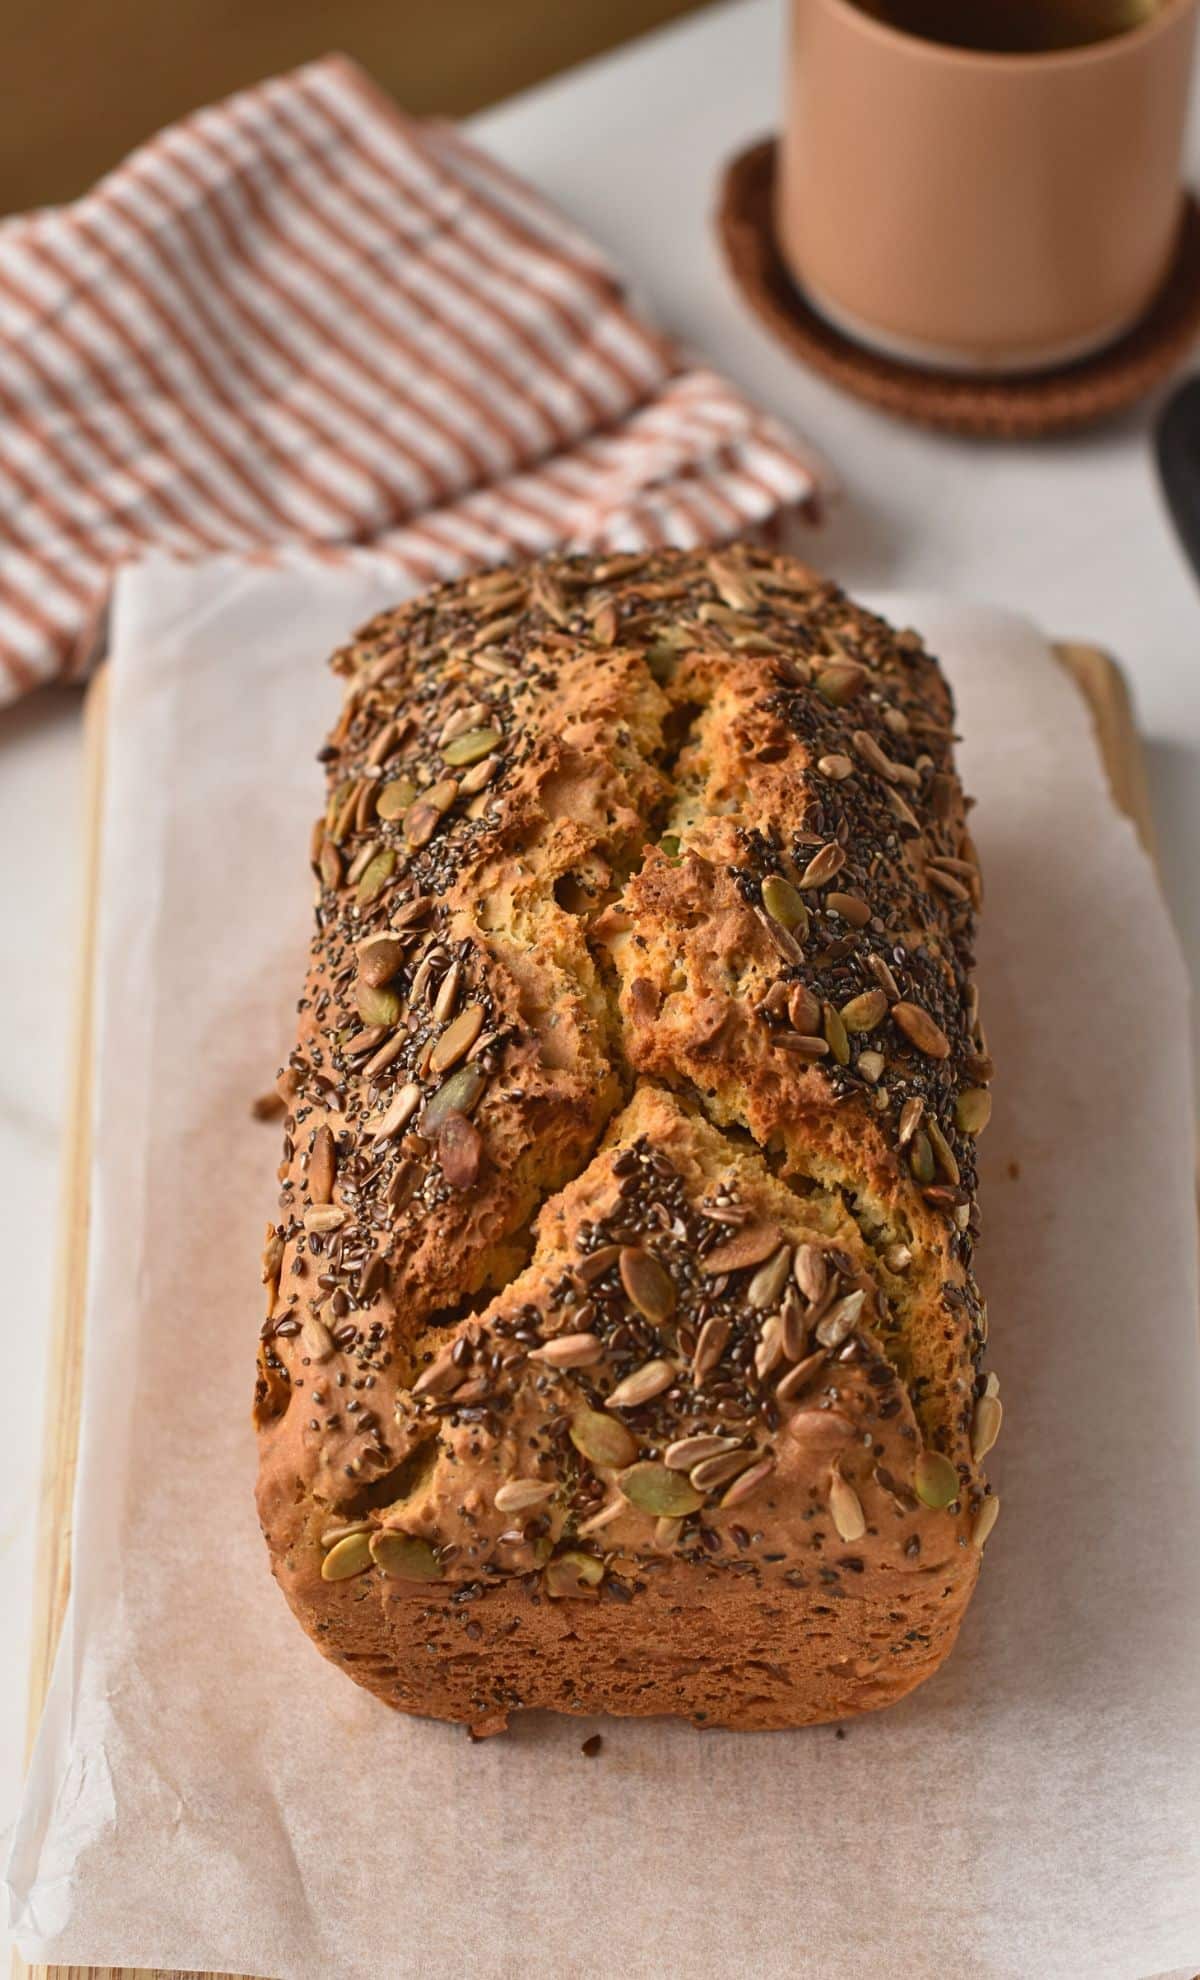
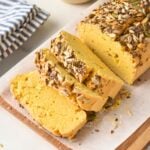
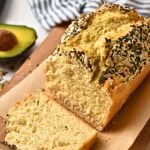
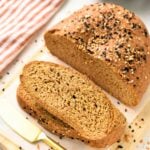
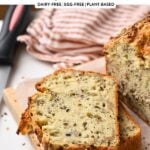
इस योगर्ट ब्रेड यह एक सरल, चार सामग्रियों से बनने वाली, खमीर रहित ब्रेड की रेसिपी है जो प्रोटीन और सूक्ष्म पोषक तत्वों से भरपूर है और बिना डेयरी और बिना अंडे के बनाई जाती है, जिससे नरम परत और कुरकुरे किनारे वाली ब्रेड बनती है।
पूरी रेसिपी नीचे दी गई है, लेकिन नीचे दिए गए मेरे सभी टिप्स देखना न भूलें, जिनमें सामग्री के विकल्प, मेरे खाना पकाने के टिप्स और चरण-दर-चरण तस्वीरें शामिल हैं!
क्या आपको यह रेसिपी पसंद आई?
एक छोड़ दो टिप्पणी नीचे देखें या हमारे पेज पर जाएं Facebook पृष्ठ जहां मैं (लगभग) सभी टिप्पणियों का जवाब देता हूं, हमारा Instagram पेज प्रेरणा के लिए, या हमारे Pinterest व्यंजनों को सहेजने के लिए!
योगर्ट ब्रेड
सामग्री
- 3 कप स्वंय बढ़ता आटा - (नोट 1)
- 1 कप डेयरी-मुक्त दही - (नोट 2)
- ¼ कप जैतून का तेल - (नोट 3)
- 1 ¼ कप सोय दूध - (नोट 4)
ऐच्छिक
- 1 छोटी चम्मच नमक
- ½ कप मिश्रित बीज - (नोट 5)
अनुदेश
- ओवन को 390°F (200°C) पर पहले से गरम कर लें। एक 9 इंच x 5 इंच के ब्रेड पैन में पार्चमेंट पेपर बिछाएं और उस पर कुकिंग ऑयल स्प्रे से हल्का सा तेल लगा लें। इसे अलग रख दें।
- एक मिक्सिंग बाउल में या स्टैंड मिक्सर में हुक अटैचमेंट का उपयोग करके, सभी सामग्री डालें।
- इसे तब तक चलाते रहें जब तक यह एक चिपचिपा घोल न बन जाए। यदि बीज का प्रयोग कर रहे हैं तो उन्हें भी मिला लें और अच्छी तरह से चला लें।
- तैयार किए गए ब्रेड पैन में घोल डालें, और यदि आप चाहें तो ऊपर से और बीज छिड़क सकते हैं।
- ब्रेड को ओवन के बीच वाले रैक पर 390°F (200°C) तापमान पर 55-65 मिनट तक बेक करें। 35 मिनट बाद पैन के ऊपर फॉयल लगा दें। बेक हो गया है या नहीं, यह जांचने के लिए ब्रेड के बीच में एक लंबी पतली सी सीख डालें। अगर सीख साफ निकलती है, तो ब्रेड ओवन से निकालने के लिए तैयार है।
- काटने से पहले इसे कूलिंग रैक पर पूरी तरह से ठंडा होने दें - लगभग 3 घंटे।
नोट्स
पोषण
सामग्री और प्रतिस्थापन
इस रेसिपी को बनाने के लिए आपको केवल 4 सरल सामग्रियों की आवश्यकता है। आइए जानते हैं कि आप इन्हें कैसे चुन सकते हैं और बदल सकते हैं।
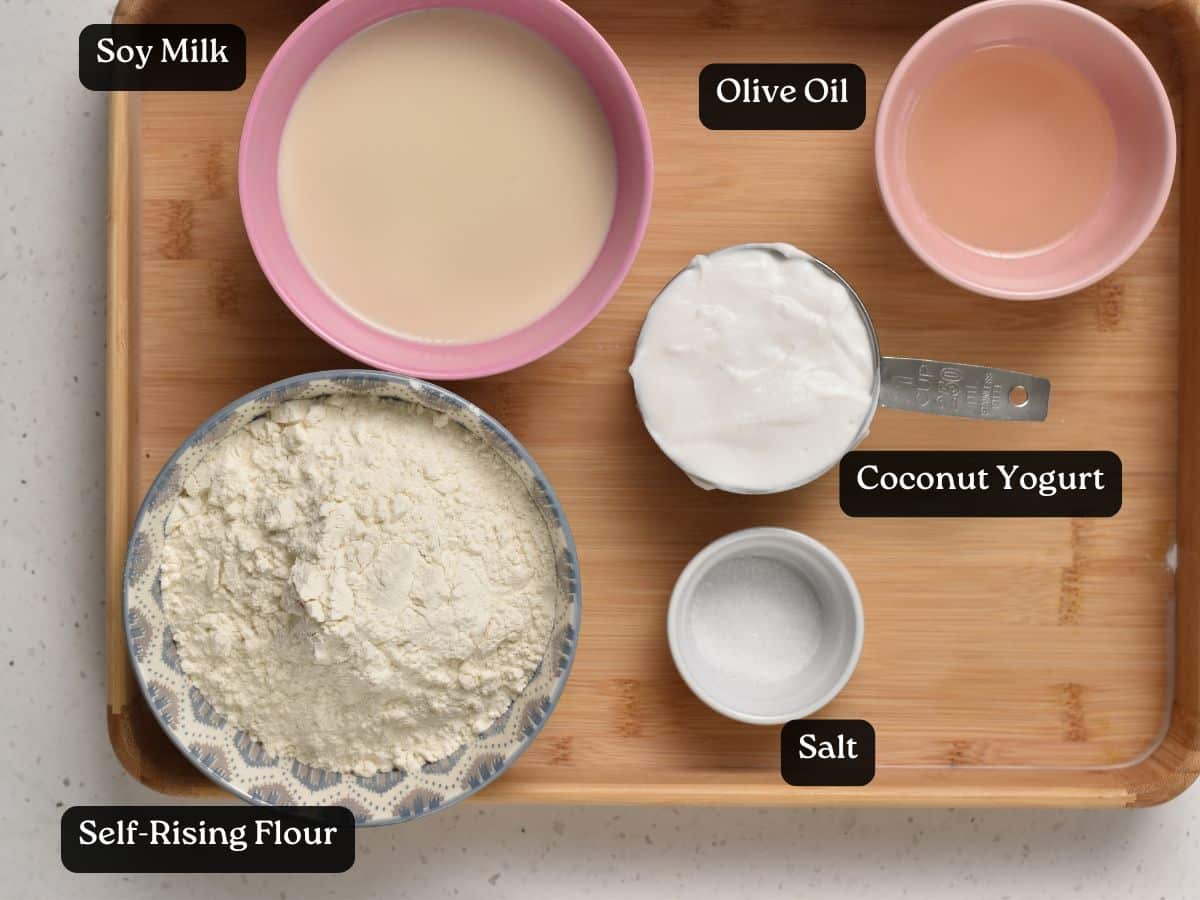
- स्वंय बढ़ता आटा – यह ब्रेड का आधार बनता है, संरचना प्रदान करता है और खमीर के बिना भी इसे फुलाने के लिए आवश्यक खमीर उठाता है। यदि आपके पास यह नहीं है, तो आप मैदा को बेकिंग पाउडर के साथ मिलाकर इसे खुद बना सकते हैं। ग्लूटेन-मुक्त विकल्प के लिए, मेरी रेसिपी का उपयोग करें। ग्लूटेन-मुक्त कनवर्टरलेकिन बेकिंग पाउडर डालना न भूलें।
- डेयरी-मुक्त दही – यह एक प्रमुख सामग्री है जो ब्रेड में नमी, कोमलता और हल्का खट्टापन लाती है, जिससे ब्रेड मुलायम बनती है। सादा सोया दही या नारियल दही इसके लिए उपयुक्त हैं।
- जैतून का तेल इससे ब्रेड में नमी बनी रहती है और वह मुलायम और चिकनी बनती है। आप चाहें तो कोई और हल्का तेल भी इस्तेमाल कर सकते हैं।
- सोय दूध इससे घोल में तरल पदार्थ की मात्रा बढ़ जाती है और सही गाढ़ापन आता है, साथ ही प्रोटीन की मात्रा भी बढ़ती है। बादाम का दूध या ओट्स का दूध भी बढ़िया विकल्प हैं।
- नमक – यह वैकल्पिक सामग्री अन्य सामग्रियों के स्वाद को बढ़ाती है और ब्रेड के स्वाद को संतुलित करती है।
- मिश्रित बीज – ये एक वैकल्पिक सामग्री हैं जो कुरकुरापन और अतिरिक्त पोषक तत्व प्रदान करती हैं। आप कद्दू, सूरजमुखी, अलसी और चिया के बीजों का मिश्रण इस्तेमाल कर सकते हैं।
योगर्ट ब्रेड कैसे बनाएं
क्या आप कुछ तस्वीरें देखना पसंद करेंगे? महत्वपूर्ण चरणों की ये तस्वीरें आपकी मदद कर सकती हैं!
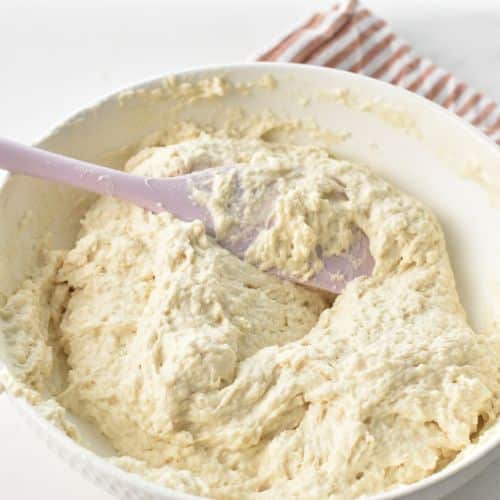
एक कटोरे में दही ब्रेड का आटा मिला लें।
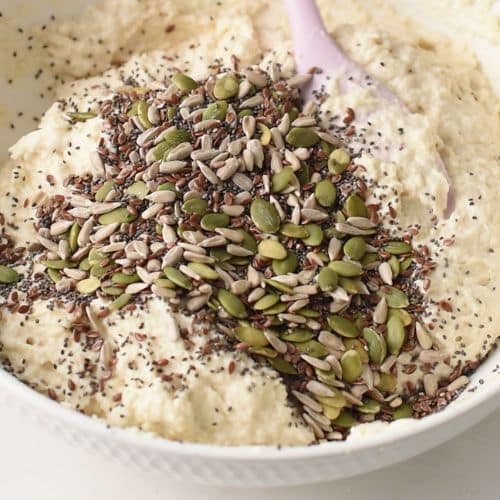
आटे में बीज मिलाए गए।
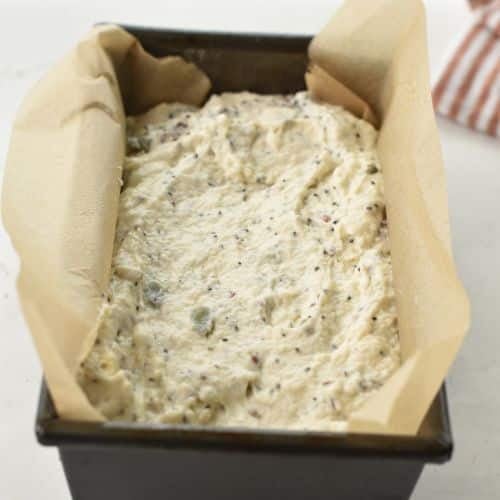
दही की ब्रेड का आटा लोफ पैन में।
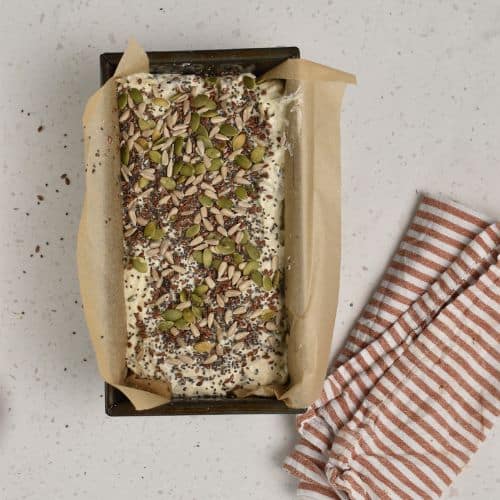
योगर्ट ब्रेड के ऊपर और भी बीज।
कैरीन के बेकिंग टिप्स
आइए, मैं आपको एक बेहतरीन योगर्ट ब्रेड बनाने के लिए कुछ और टिप्स बताती हूँ।
- फुल फैट दही चुनें – अपनी ब्रेड को बेहतरीन बनावट और नमी देने के लिए, सादा, फुल-फैट और डेयरी-फ्री दही का इस्तेमाल करें। इससे ब्रेड की मुलायम बनावट प्राप्त करने में मदद मिलती है।
- अधिक मिश्रण न करें सामग्री मिलाते समय, बस तब तक चलाएँ जब तक कि एक चिपचिपा घोल न बन जाए। ज़्यादा चलाने से ग्लूटेन ज़्यादा सक्रिय हो सकता है, जिससे ब्रेड सख्त हो जाएगी।
- अपने आटे को अपनी पसंद के अनुसार बनाएं – अगर आप फाइबर की मात्रा बढ़ाना चाहते हैं, तो सफेद गेहूं का आटा या सेल्फ-राइजिंग और सफेद गेहूं के आटे का आधा-आधा मिश्रण इस्तेमाल करें। रेसिपी में बताए अनुसार, अगर आप सामान्य मैदा या गेहूं का आटा इस्तेमाल कर रहे हैं, तो बेकिंग पाउडर डालना न भूलें।
- अतिरिक्त कुरकुरापन जोड़ें – ब्रेड को प्रोटीन से भरपूर बनाने और उसमें कुरकुरापन लाने के लिए, आप बैटर में मिश्रित बीज मिला सकते हैं। देखने में सुंदर बनाने और ब्रेड को और भी कुरकुरा बनाने के लिए आप ऊपर से अतिरिक्त बीज भी छिड़क सकते हैं।
- गोल्डन टॉप के लिए पन्नी – लगभग 35 मिनट तक बेक करने के बाद ब्रेड पैन के ऊपरी हिस्से को फॉयल से ढकना एक महत्वपूर्ण कदम है। इससे ऊपरी सतह को ज़्यादा भूरा होने से बचाया जा सकता है, जबकि अंदर का हिस्सा पूरी तरह से पक जाता है।


thanks again for another great recipe and concise directions to make
मुझे वह अच्छा लगता है!
Judging by the size of your loaf tin in the photos, it looks to be about 12cm. I only have a 25cm loaf tin, will the mix be enough?
I always bake with a 9×5 inches loaf pan.
It was perfect. The taste, the moisture, lasted for days. All really good
शुक्रिया
The yogurt bread recipe was delicious. The only thing I found it very sticky and difficult to add the seeds. I would definitely make it again.
शुक्रिया,
Yes, the batter is sticky, you can add the seeds with the flour, so it incorporate easily as you stir everything togehter.
Hi, can you please confirm what ingredients to omit when using the gluten free converter?
Do I still include the yoghurt etc?
Of course, it’s a yogurt bread the gluten-free converter is only here to replace the self-rising flour by a bunch of dry ingredients that will mimic the gluten function in the bread. But as mentioned in the note, this bread has a gummier, denser texture with gluten-free flour because of the high moisture content from yogurt.
I thought possibly to use almond flour or chickpea flour instead but not sure if it will hold. what is the best flour to use if you want to use other plant based flour?
The recipe will never firm up with almond flour, it will be a warm soupy texture. With chickpea flour it will be rock, dense and hard since there’s no gluten to raise the bread. The only swap are white spelt flour in which you need to add 1 1/2 teaspoon baking powder per cup of flour.
Can’t wait to try this Many Thanks.
मुझे इन पर आपकी प्रतिक्रिया जानने की प्रतीक्षा रहेगी।
What size loaf pan?
Everything is well written above in the recipe card
I used whole wheat flour and almond milk. I also divided the bread into biscuits because the dough was heavy. The bread turned out perfectly & was delicious.
The batter is not supposed to be heavy but since you mentioned using wholewheat flour, it explain why the texture is so different. Glad you still enjoy it!
ok so I used 10% fat yoghurt, and almond milk, but the rest was exactly as you stated… but mine came out really stodgy and and squidgy… any idea as to where I went wrong?
The swap to almond milk removes the essential protein “scaffolding” provided by soy milk, causing the bread’s structure to collapse into a dense, stodgy mass. Simultaneously, the higher water content in the 10% yogurt over-hydrates the starches, resulting in a gummy, “squidgy” interior that cannot properly set during baking.
thanks for the reply. but you mentioned in the notes that almond milk would work ? so can I continue to use the almond milk, but instead use full fat yoghurt next time or is there a combination im missing ? I dont like soy milk hence the almond … thanks Sinead
Yes, my recipes swaps are here to give you options, but as soon as you use one swap you change the chemistry of the recipe and you can’t expect the exact same texture, or taste. If you use one swap, usually you won’t see much of a difference, 2 swaps are noticeable, 3 it’s a new recipe and you can’t expect the result seen in my pictures. I don’t think swapping soy milk for almond milk makes a noticeable difference if you use regular full-fat yogurt (I baked this with dairy-free coconut yogurt), I tried almond milk and it was great. I think your main issue is your yogurt that adds too much moisture