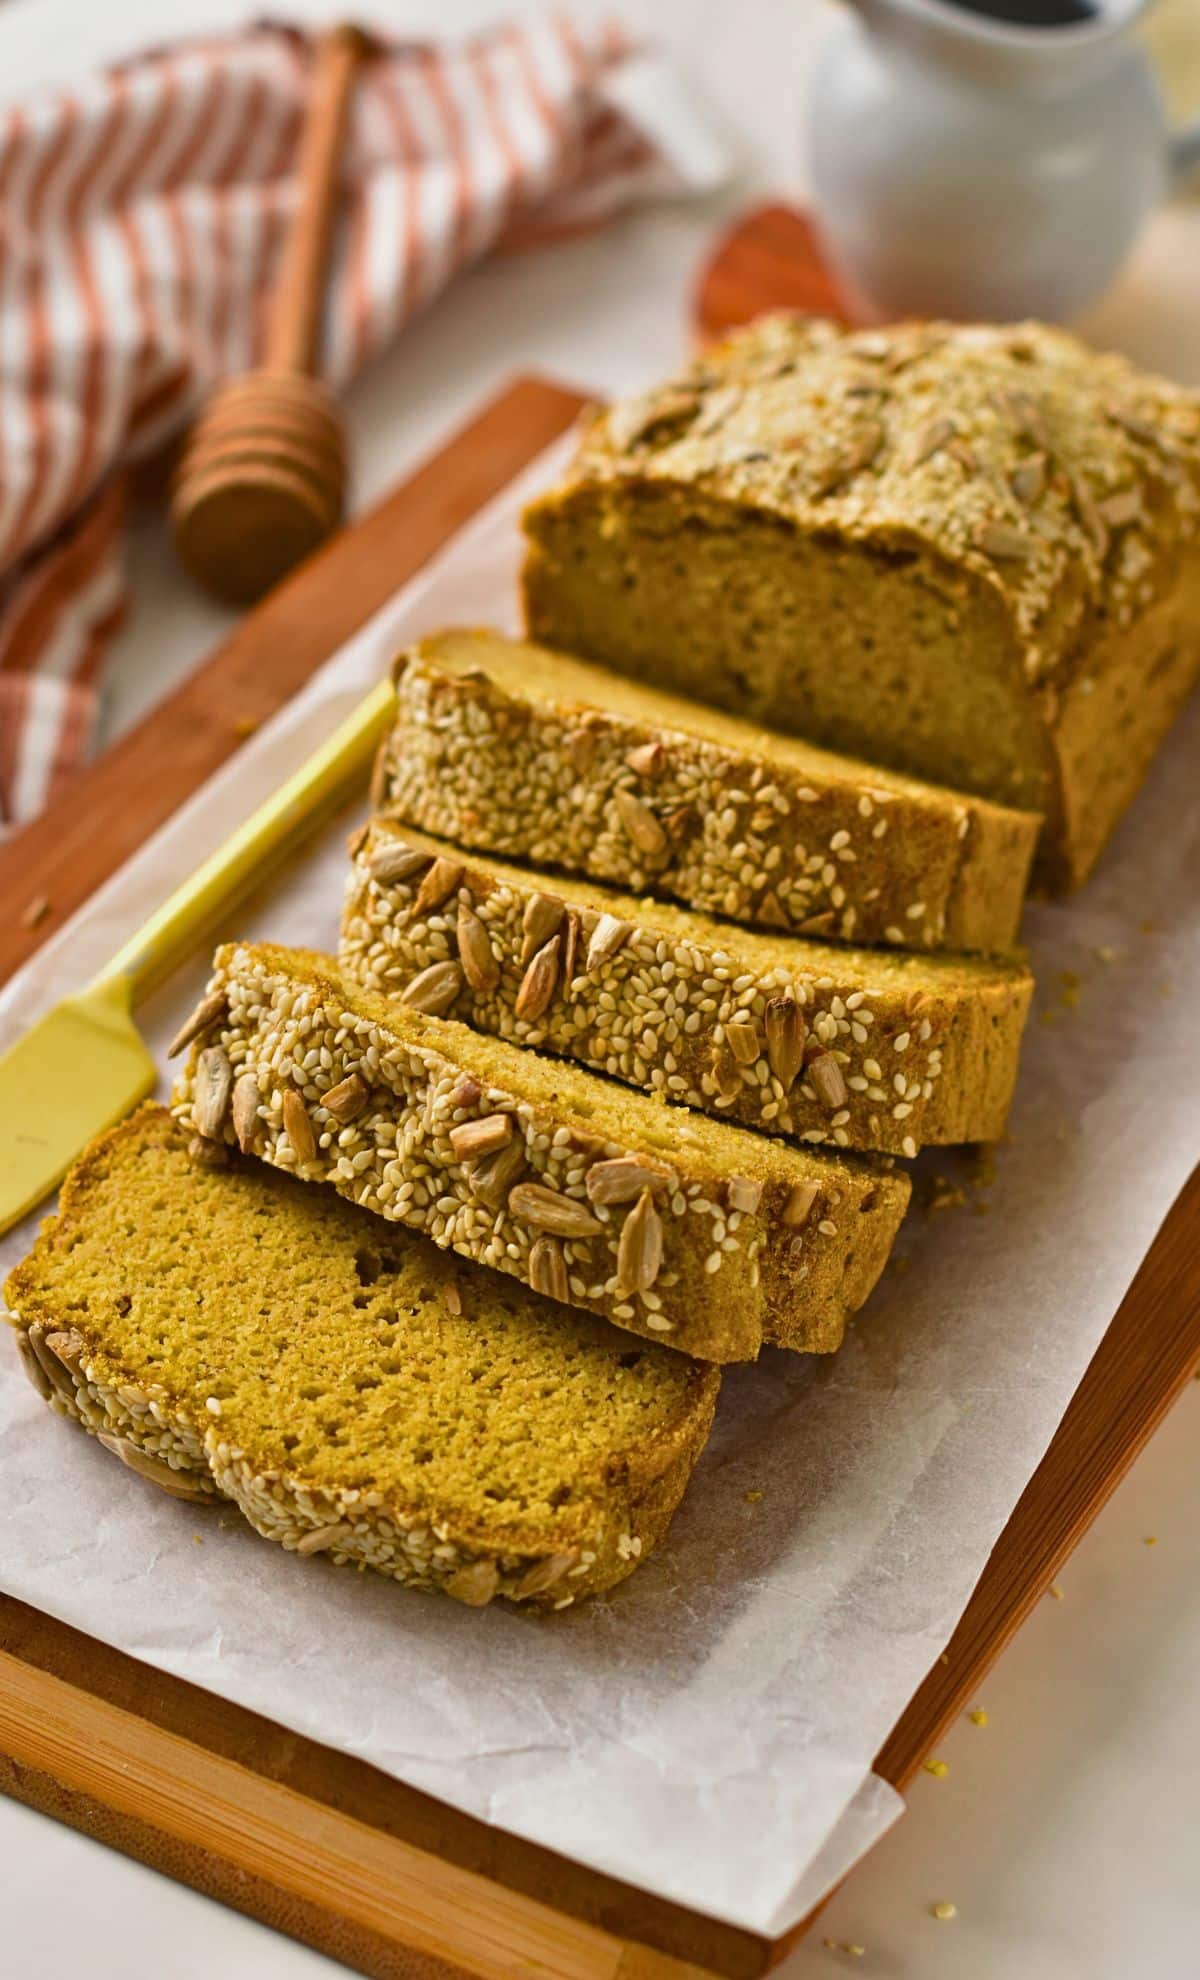
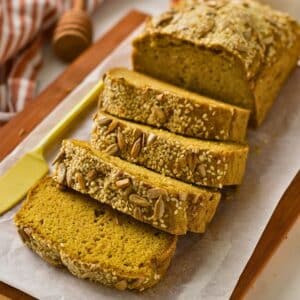
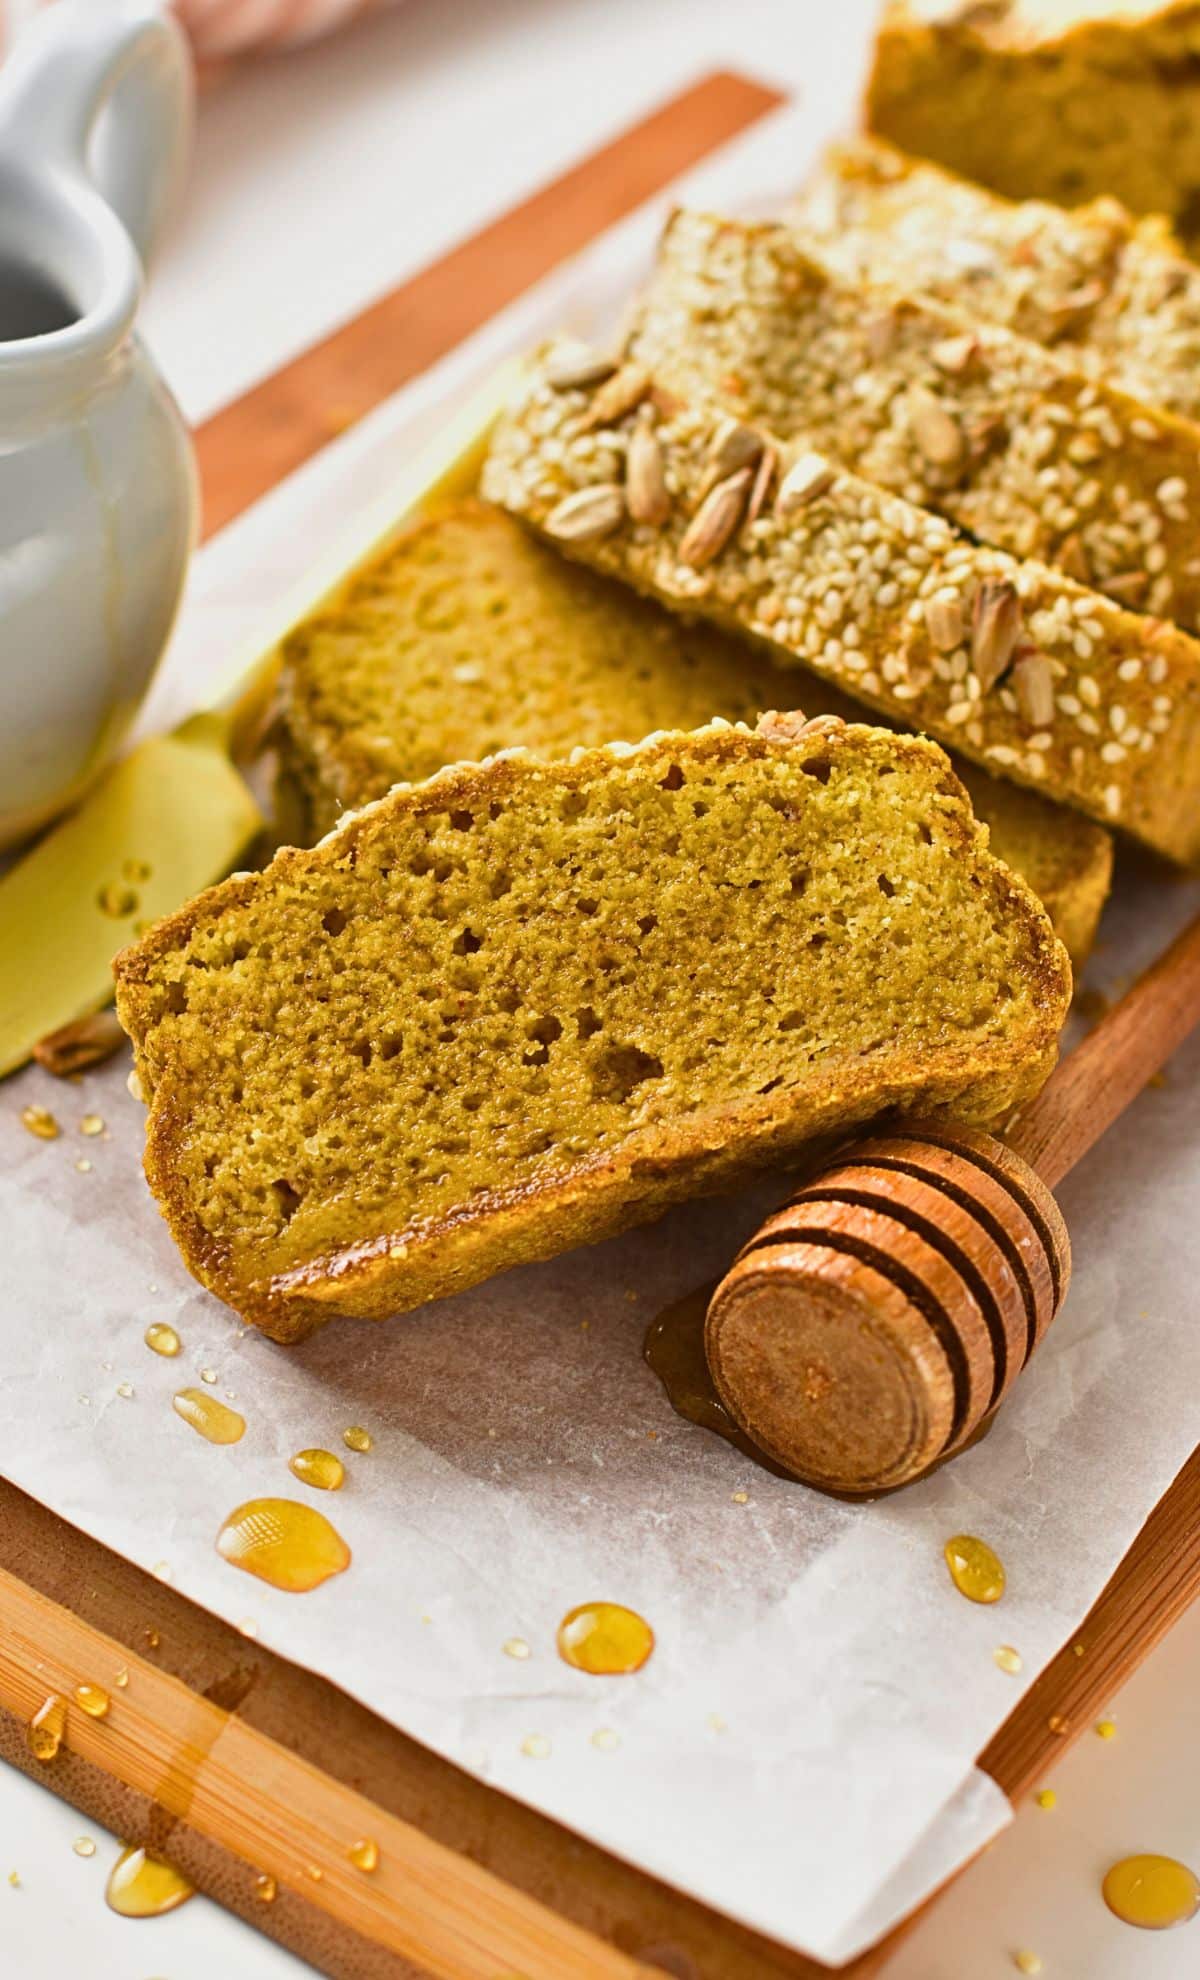
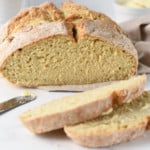
This Millet Bread is the perfect gluten-free bread for sandwiches or breakfast toast with a delicious earthy millet flavor and you can whip it up in 10 minutes. It freezes well, toasts well, and can be used as an all-purpose gluten-free bread. Plus, millet bread is packed with fiber, and with 4 grams of protein per slice, it will keep you full for hours.
I love making my own bread, and after trying minimalistic recipes, like my 2-Ingredient Bread, classic recipes like my Vegan Irish Soda Bread, or simple recipes like Oat Flour Bread, I wanted to make a healthy, gluten-free bread with millet flour.
Millet flour is a great source of protein, fiber, vitamins, and minerals, so it’s an all-around great alternative to classic flour. This ancient grain was one of the very first grains cultivated and has been used ever since to make bread like this.
While the whole recipe is just below, don’t miss all my tips further down, including ingredient swaps, my cooking tips, and step-by-step shots!
Like This Recipe?
Leave a comment below or head to our Facebook page where I reply to (almost) all comments, our Instagram page for inspiration, or our Pinterest for saving recipes!
Millet Bread
Ingredients
- 1 ½ cups Stoneground Foxtail Millet Flour - (note 1)
- 3 tablespoons Psyllium Husk - (note 2)
- 2 tablespoons Mild-Flavor Olive Oil - (note 3)
- 2 cups Lukewarm Water - 37C/98F
- 2 teaspoons Baking Powder
- ½ teaspoon Salt
Toppings
- ⅓ cup Seeds of Choice - pumpkin, sesame, sunflower
Instructions
- Line a 9-inch loaf pan with lightly oiled parchment paper. Set aside.
- Preheat the oven to 400 °F (200 °C).
- In a mixing bowl, whisk dry ingredients: millet flour, psyllium husk, salt, and baking powder.
- Add oil and lukewarm water (bath temperature), stirring with a rubber spatula until the batter forms a ball that is a bit sticky and bouncy.
- Place the dough into the prepared pan and brush the top with a bit of water then sprinkle the seed mix on top.
- Bake the bread for 40-45 minutes at 400 °F (200 °C) until a pick inserted in the center of the bread comes out nice and clean.
- Let the bread cool on a cooling rack for at least 5 hours to overnight before slicing. If you slice it too early, it will pack and become dense.
Notes
Nutrition
Ingredients and Substitutions
You don’t need many ingredients to make this simple bread. Here’s how to pick them.
- Millet Flour – Use ultra-fine, store-bought millet flour. Home-ground millet from hulled grains can result in coarse flour, leading to a gritty texture.
- Psyllium Husk – Acts as a binder, giving the dough elasticity. Whole psyllium husk works best. Do not use psyllium-based supplements like Metamucil—they contain fillers that will alter the texture and give an unappetizing purple hue.
- Light Olive Oil – A neutral oil like avocado or sunflower oil also works well. Avoid oils with strong flavors (like extra virgin olive oil) unless you want it to affect the taste.
- Lukewarm Water (98°F/37°C) – Warm water helps activate the psyllium for better dough structure. Be mindful not to use hot water, as it will make the bread dense by partially cooking the batter before baking.
- Seeds for Topping – Customize with pumpkin, sunflower, sesame, flaxseeds, or even poppy seeds.
How to Use Millet Bread
This healthy bread can be used for everything from breakfast to snack!
- For Breakfast: Toast with peanut butter, jam, or avocado slices.
- For Sandwiches: Layer with vegan cheese, fresh veggies, and hummus for a yummy lunch.
- As a Snack: Spread with butter and honey or chocolate hazelnut spread for a sweet treat.
- Crispy Option: Brush slices with olive oil and bake in the oven to make gluten-free crostini.
Carine’s Baking Tips
I have a few more tips for you that couldn’t fit in the recipe card.
- Don’t make your own millet flour for this bread recipe. A home blender will never create a consistent ultra-fine flour that makes the bread smooth, not gritty.
- Use the right psyllium husk. Powder is more absorbent than whole husk, which is what I am using here. If you use psyllium husk powder use 1/2 teaspoon less. Don’t use husk supplements. They are not made for baking.
- Don’t swap husk for anything else, this recipe won’t work without husk as a binder.
- Make sure you knead the dough until it forms a ball and the husk and millet have absorbed all the moisture. You may want to let the batter rest for 10 minutes and knead again. If your water isn’t warm enough, it takes a bit more time for the husk to do its job and bind the flour.


Hi I made this recipe and I really like it. My question is, how much should it rise? Mine is only 2” high. Perhaps it’s because I ground the millet myself? My coffee grinder did make a fine flour though!
Thanks!
There’s no gluten, so it won’t rise much it stay very flat.
Hi Carine
I tried this recipe today and made several mistakes. The mixture seemed really watery, so I added another cup of millet flour. I think reducing the water to 1 1/2 cups might be a good solution, but not sure. I wonder if adding 1/2 cup of oat or almond flour might be a good way to go instead of what I did do. I had psyllium seed powder in the house which I purchased several years ago from Mountain Rose Herbs. It worked just fine on the Almond and Flax seed breads… but the dough was so loose on the millet bread recipe that I added another teaspoon of psyllium powder to the mixture. Also baked it in a pan that made it more like a flat bread 1″ thick. Didn’t realize I should have put the olive oil in with the water, but brushed the top of the loaf with the oil. The flour was brand new… so what did I do that caused it not to rise? The dough was super sticky, almost runny before I added my additions. Still, even at 1″ thick, it was very good… and the everything bagel seasoning on top gave it that wow factor.
I am glad it worked with these alterations.
Do you have a recipe for raisin millet bread? That’s my favorite.
Not yet sorry!
I noticed that you mentioned to only use whole psyllium husk but, not the supplement. Will the supplement cause the bread to not rise? How did you get the orange/brown color of the bread? Thank you.
Psyllium husk is not used to rise the bread, but it’s a binder in gluten-free baking. The supplement is made at 50% of husk only, plus 50% fillers not made for baking. As a result, it won’t bind and often turn the food purple! The color on the simply comes from millet itself.
Hi Carin! My bread rose beautifully in the oven but collapsed after I took it out. Do you know what I might have done wrong? I want to try it again but have no idea where to start. Thank you!
In a gluten-free, yeast-free bread (a quick bread), collapse usually happens because of a critical imbalance between liquid and structure-builders. Too much liquid or too little binder. I will review my measurement precisely.
Hi Carine, I am a food blogger myself and I never follow a recipe until I recently discovered Millet flour and I found your bread recipe. OMG you are awesome, I followed your recipe and added one tablespoon of ground flaxseed. Bread came out amazing and I spread homemade hummus and it tasted so delicious. Thank you so much for your easy to follow recipe.
That’s amazing, thank you!
Hi Carine. Wondering if this recipe would work with Buckwheat Flour? Have you tried using ground chia seeds instead of Psyllium husk as a binder? Thanks
Try my vegan gluten-free bread recipe if you want to bake with buckwheat flour. Millet flour is never a 1:1 ratio swap to buckwheat.
Will chia seeds work for this instead of psyllium husks? I saw someone used as a substitute in your quinoa bread and they said worked great. I wonder how much you would need to use.
They are both different ingredient with different purpose. Husk is pure fiber it gives elasticity, chia seeds binds a little but not as much, it provide no chewy texture. A 1:1 swap will not provide the same bread, here the bread will be much more dense and hard with chia seeds and you will probably need way more.
I love this recipe! It was easy to make and required few ingredients. I spinkled everything bagel seasoning on top! The texture is amazing. Soft and warm from the oven….just like regular bread would be that has gluten. I’ll be making this weekly! Thank you!
love this but it’s never formed a ball and I have to a lot less water. my ingredients are Bobs Red Mill Millet flour and organic psyllium husk whole. not sure if that’s the problem. would anyone know? I can’t do flour so it’s really nice to have this alternative.
If it doens’t form it means you miss fiber, it can be the way you measure the ingredient, it can be a millet flour that is coarser, or same with husk. Simply add more husk, or less water as you did.
Thank you so much for the lovely feedback!
I love the photo of the hosts on this page. Totally trustworthy. Following.
And thank you for the lovely recipe.
Thank you so much ! I take hours cooking, shooting my own photography an videos and it makes me very happy that you enjoy my work.