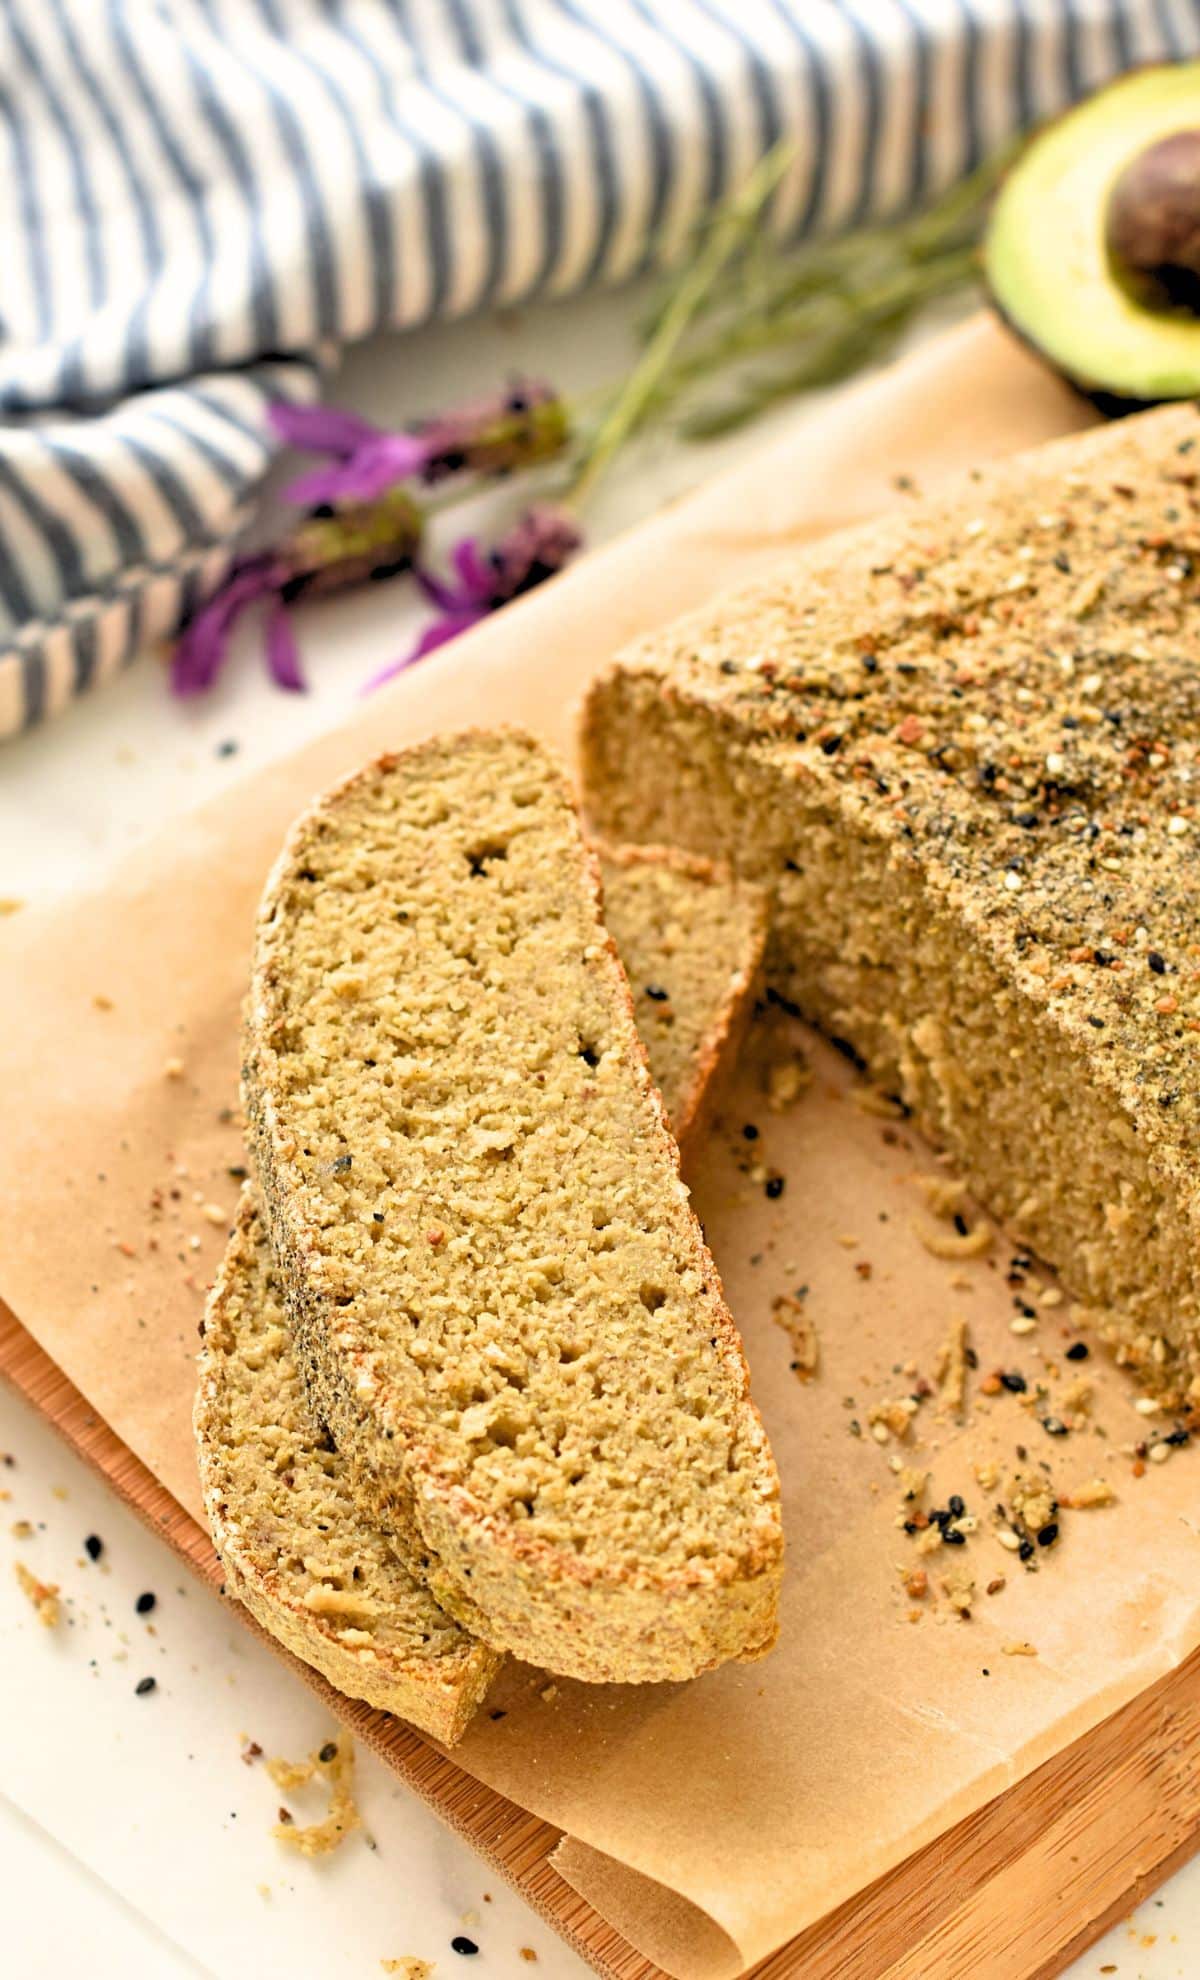
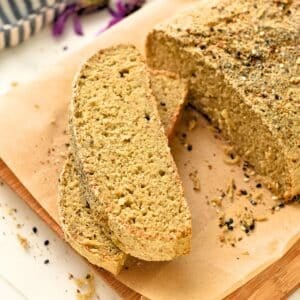
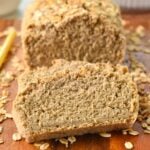
This Quinoa Bread is an easy, yeast-free, gluten-free sandwich bread perfect for adding protein and fiber to your sandwich.
I love making simple and healthy bread, like I did my Millet Bread and Oat Flour Bread but I also love baking with quinoa. So I decided I needed to make a bread loaf with quinoa, a healthy and very nutritious grain.
This bread is super easy to make, with no kneading needed, no yeast. It has a soft crumb, relatively dense, with no bitter taste and it’s easy to make it sweet or savory.
While the whole recipe is just below, don’t miss all my tips further down, including ingredient swaps, my cooking tips, and step-by-step shots!
Like This Recipe?
Leave a comment below or head to our Facebook page where I reply to (almost) all comments, our Instagram page for inspiration, or our Pinterest for saving recipes!
Quinoa Bread
Ingredients
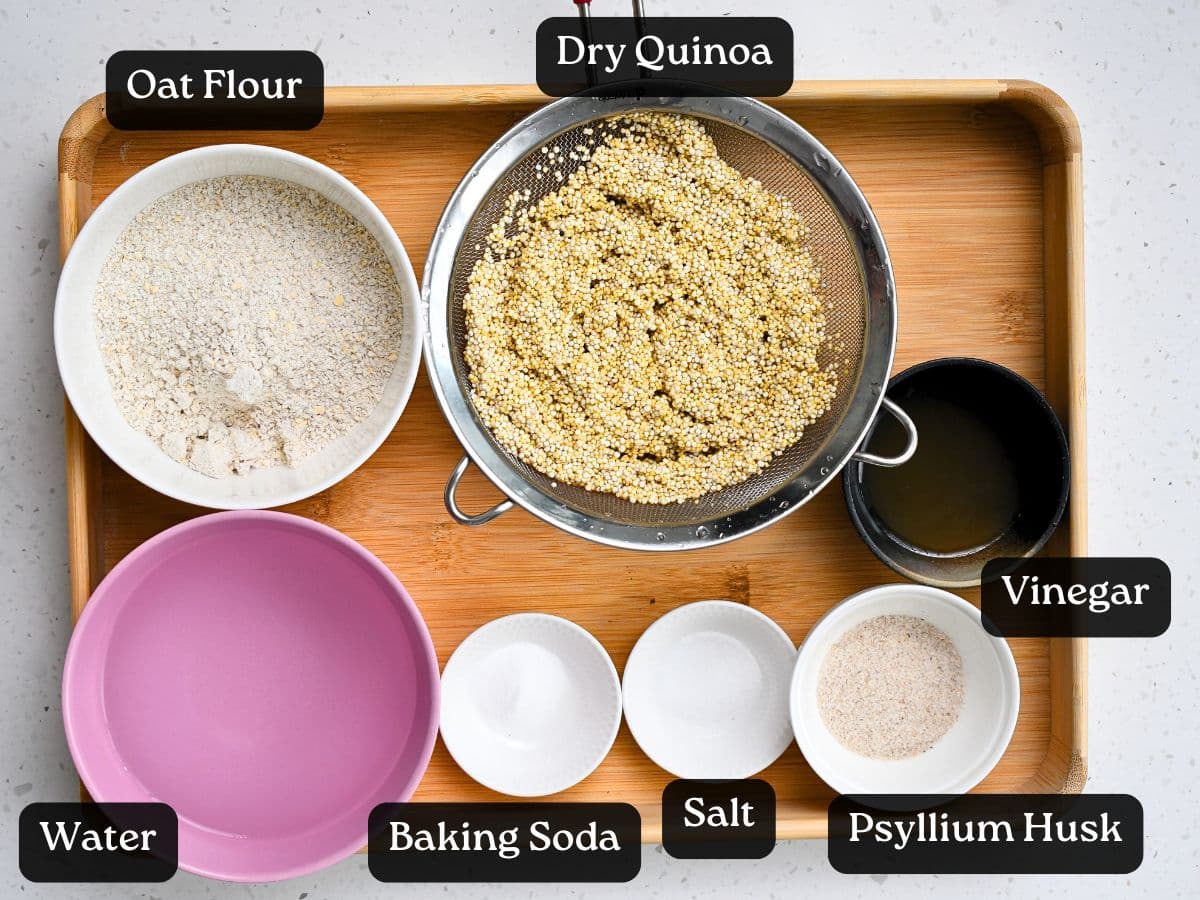
- 1 cup Dry Quinoa - soaked, rinsed, drained (note 1)
- 1 ½ cup Homemade Oat Flour - (note 2)
- 3 tablespoons Psyllium Husk Powder - (note 3)
- 1 teaspoon Baking Soda
- 1 ½ cup Lukewarm Water - (note 4)
- 2 tablespoons Apple Cider Vinegar - (note 5)
- 1 teaspoon Salt
Instructions
- Place the dry quinoa in a bowl, cover with cold tap water. Set aside 3 hours or overnight to soak.
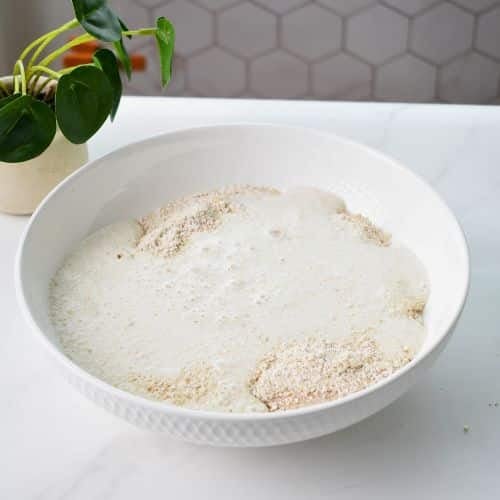
- Drain the quinoa over a sieve, give it a quick rinse, then transfer to a high-speed blender with the lukewarm water.
- Blend for 20-30 seconds on medium-high speed until no more quinoa grain can be seen. Stop the blender and set it aside.
- In a mixing bowl, add oat flour, salt, baking soda and psyllium husk powder. Whisk to evenly combine the dry ingredients together.
- Pour the mixture from the blender into the bowl with the dry ingredients and add the apple cider vinegar.
- Use a rubber spatula to stir and combine the ingredients together. As you stir, it forms a thick moist, greyish dough. It takes about 1 minute to form. The time for the husk and oat to absorb the liquid and form a dough.
- Set it aside for 10 minutes.
- Meanwhile, preheat the oven to 350 °F (180 °C). Line a baking sheet with light oiled parchment paper.
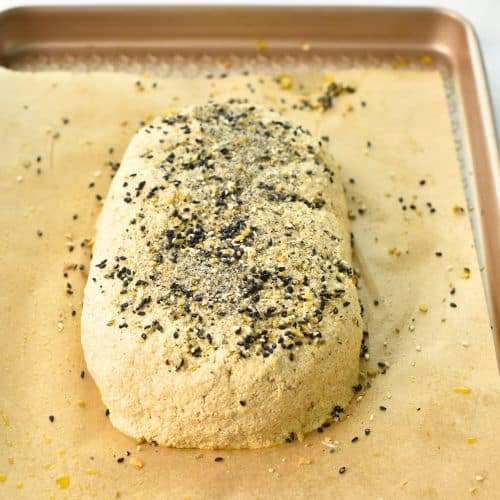
- Place the bread dough on the prepared baking sheet. This bread won't raise because it contains no gluten. It won't change in shape or size, so the shape you give now matters.
- Lightly oil your hands and rub around the dough to shape an oval bread that has a maximum height of 2 inches (5 cm). If thicker, it won't bake well in the center and stay moist.
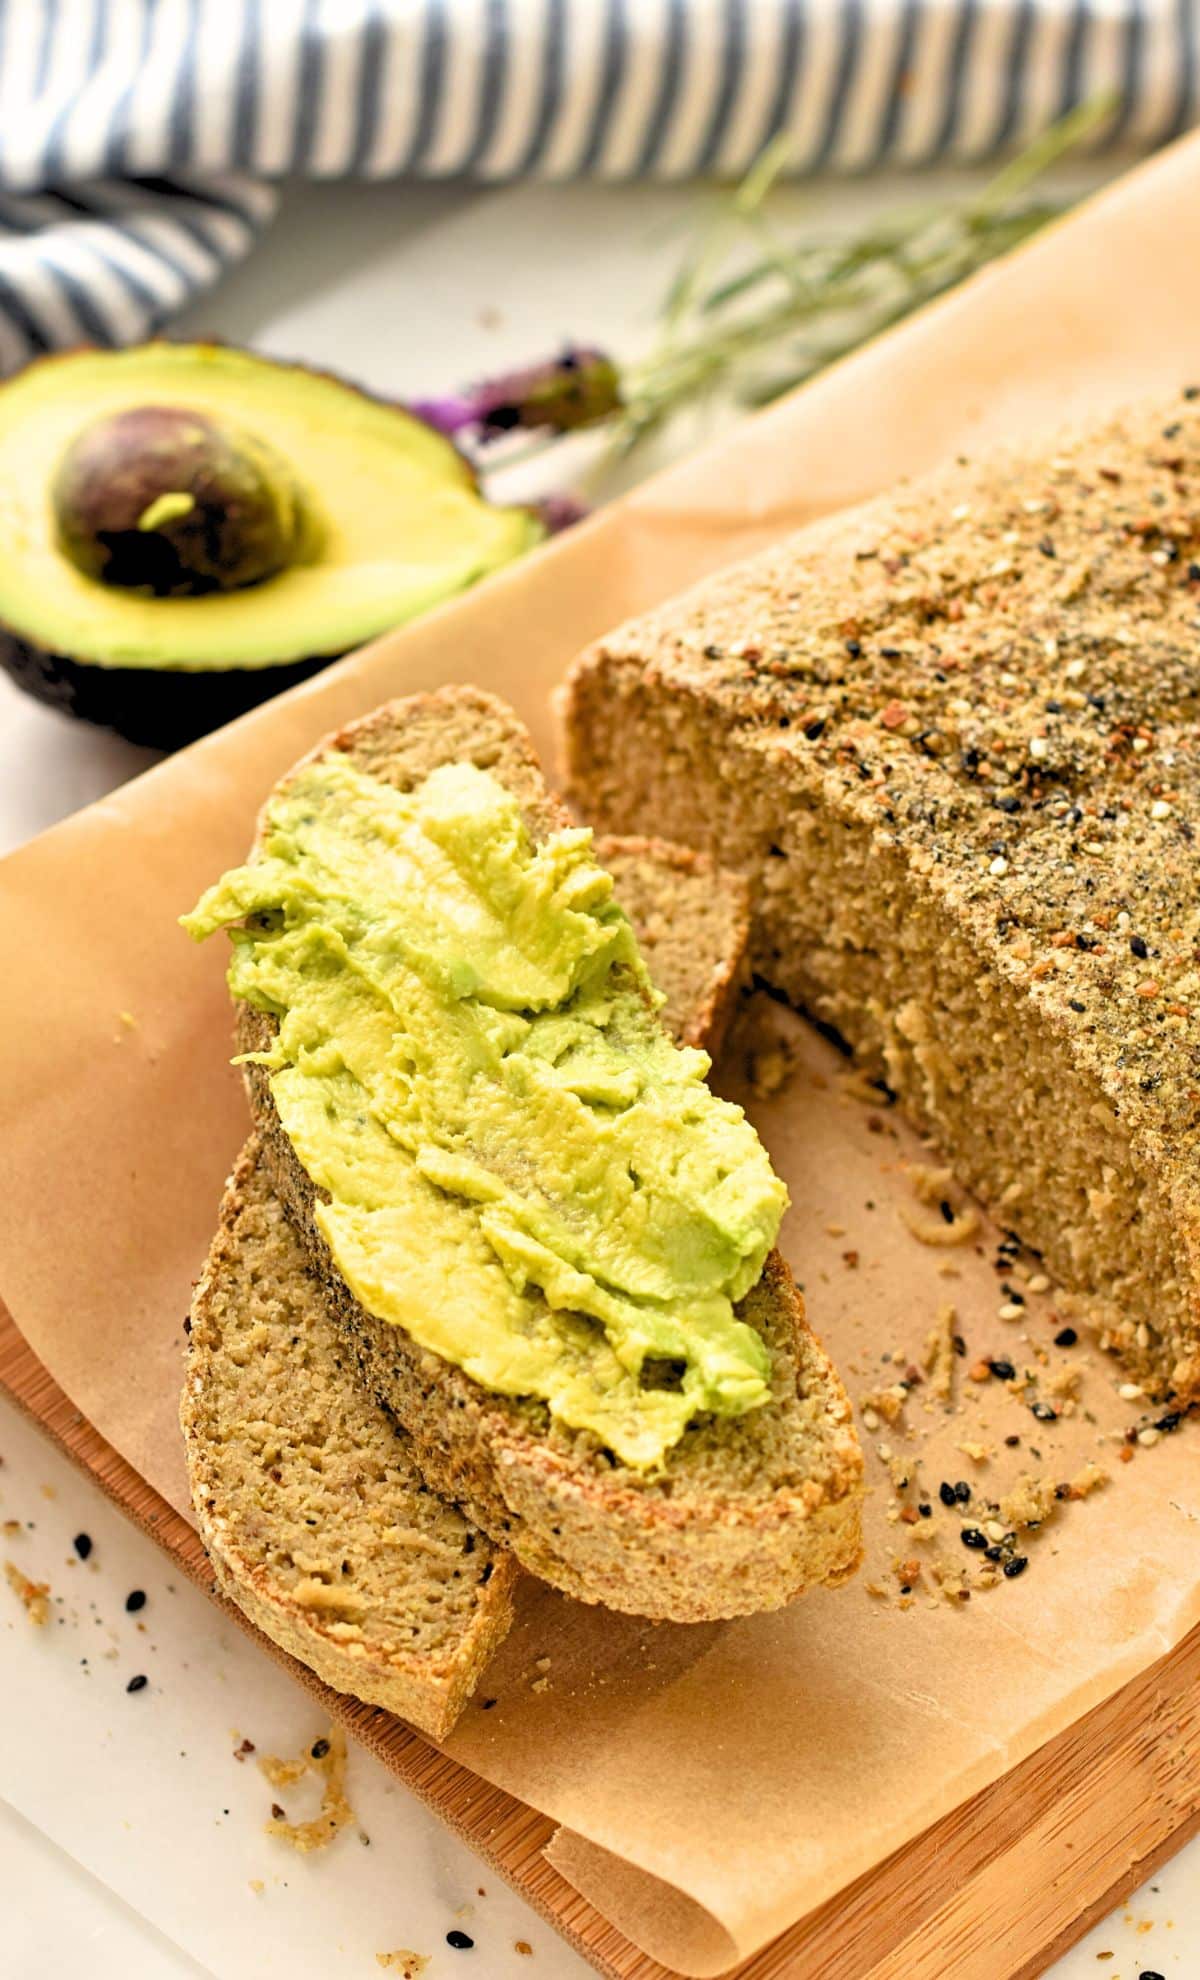
- Sprinkle some bagel seasoning on top of the bread and bake on the center rack of the oven for 1 hour at 350 °F (180 °C). You know the bread is ready when it's hard and crusty on the outside and a pick inserted in the center of the bread comes out with just a bit of sticky batter. It should not be a lot of it and it should not be liquid, just crumbs. If so, it means you didn't add enough husk and need to bake it for longer.
- Let the bread cool down on a cooling rack for 3 hours or overnight before slicing.
Notes
Nutrition
Nutritional Highlights
- Protein and Fiber Boost – Two slices provide 10g of protein and 10g of fiber, keeping you full and helping digestive health. It’s perfect for a high-protein, plant-based diet.
- Wholesome Ingredients – Made without refined flours or protein powders, this bread is a natural, nutrient-dense option.
Ingredients and Substitutions
- Quinoa – The base ingredient that provides protein, fiber, and structure to the bread. Soaking raw quinoa softens it for blending and activates its nutrients. Red quinoa works as a substitute for visual variety, but avoid cooked quinoa as it won’t bind properly.
- Oat Flour – Adds body and mild sweetness to the bread while being gluten-free. Use certified gluten-free oats if necessary. You can replace oat flour with sorghum flour or a mix of almond flour and coconut flour, but adjustments to liquid content may be required. Avoid using coarse oats as they won’t blend evenly.
- Psyllium Husk Powder – Acts as a binder and provides chewiness, replacing gluten and eggs. Use 20% more if substituting with psyllium husk flakes. Avoid supplements like Metamucil as they can ruin the texture and cause discoloration.
- Baking Soda – Provides leavening to slightly lift the bread. Make sure to pair it with an acidic ingredient like apple cider vinegar for activation. Baking powder can be used as a substitute, but it won’t provide as much rise.
- Lukewarm Water – Hydrates the ingredients and creates a smooth batter. Avoid cold or boiling water, as the texture will not develop properly.
- Apple Cider Vinegar – Reacts with the baking soda to help the bread rise and adds a subtle tang. Lemon or lime juice can be used as alternatives. Avoid skipping this ingredient, as the bread won’t rise without it.
- Salt – Enhances the overall flavor. Any kind of fine salt works, but don’t use coarse salt as it may leave uneven salty spots in the bread.
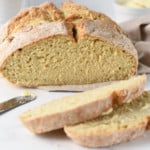
How to Make Quinoa Bread
This recipe is super simple to make. Here’s how in pictures.
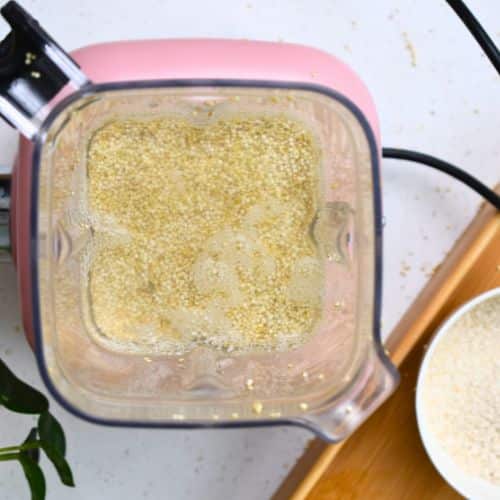
Blend the soaked quinoa in a high-speed blender until smooth.
Combine the other bread ingredients in a large mixing bowl.
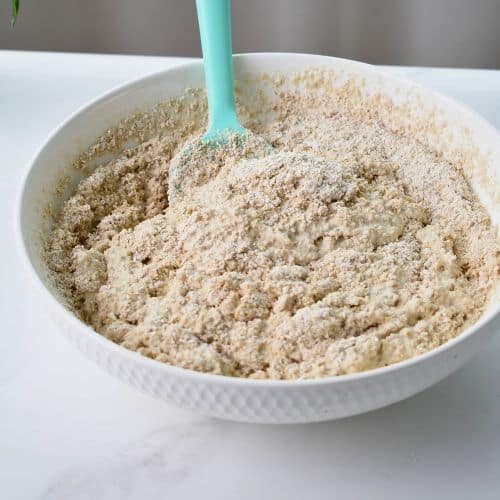
Incorporate the quinoa mixture and the apple cider vinegar.
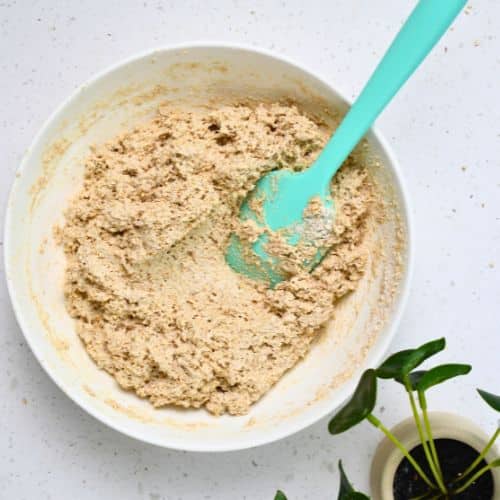
Stir the dough with a silicone spatula until it’s well combined.
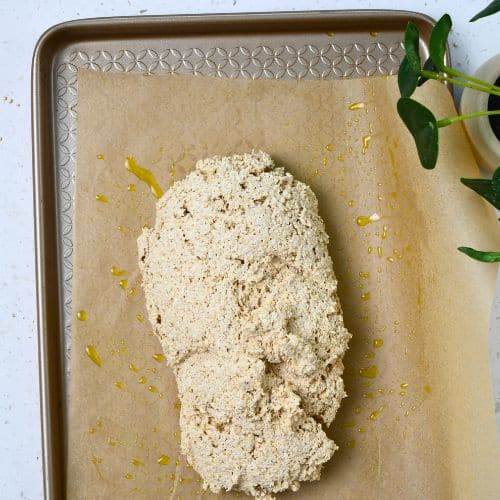
Transfer the batter to a baking pan lined with parchment paper and smoothen and shape the dough into a loaf.
Sprinkle some bagel seasoning and bake the bread for 1 hour at 350 °F (180 °C).
Bread Flavor Options
This recipe is very easy to make sweet or savory by incorporating additional ingredients into the batter.
- Sweet Bread – Add 1 teaspoon of cinnamon to the dry ingredients and 1/2 cup of finely chopped dried fruits like apricot, dried cranberries, or dates.
- Savory – Add 1/2 teaspoon of onion powder or garlic powder and 1 teaspoon of cumin or paprika to the dry ingredients. Stir in 1/2 cup of seeds or chopped sundried tomatoes. I don’t recommend stirring wet grated vegetables into this bread as it won’t bake in the center and stay too moist.
Carine’s Baking Tips
While this recipe is really easy, I have a few more tips for you to make the best bread possible.
- Soak Quinoa Overnight – Soaking not only softens the quinoa but also removes bitter saponins for a better flavor.
- Blend Quinoa Smoothly – Blend until no visible grains remain for a uniform batter. A high-speed blender is ideal.
- Don’t Skip Psyllium Husk – It’s crucial for binding the ingredients. Using substitutes or skipping it will lead to crumbly bread. Don’t use Metamucil!
- Shape the Dough Properly – Since the bread doesn’t rise, shaping it to your desired loaf size and height before baking is essential. Keep it under 2 inches tall for even cooking.
- Test for Doneness – Insert a skewer into the bread; it should come out with some crumbs, not wet batter. If unsure, bake longer to avoid a soggy center.
- Cool Completely Before Slicing – Allow the bread to cool for at least 3 hours to set the structure and avoid crumbling.
- Customize Flavors – Mix sweet or savory add-ins into the dry ingredients. Avoid wet ingredients like grated vegetables, as they make the bread too moist. Add seeds to the batter like 1/2 cup of sunflower seeds or pumpkin seeds to add crunch and healthy fats.
- Use Fine Oat Flour – Coarser flours won’t bind properly, leading to a grainy texture. Make your own by blending rolled oats into a powder.
- Watch for Psyllium Husk Reaction – If your bread turns purple, it’s safe to eat but may need a different brand of psyllium for aesthetic purposes.
- Toast for Extra Crunch – If the bread feels too moist, toasting slices before serving enhances texture and flavor.
Common Issues and Fixes
If you still have issues, I have a few suggestions on what and how to fix common problems.
- Purple/Blue Bread – Some psyllium brands react with baking soda, causing discoloration. Use whole psyllium husk or switch brands. However, if the bread is purple, it doesn’t affect its taste or texture.
- Bread Too Moist – Likely caused by insufficient psyllium or coarse oat flour. Bake longer or toast slices to resolve.
- Cracks While Shaping – If the dough cracks, add a teaspoon of water at a time and knead gently until smooth.


Real good, I added two tablespoons of flexseed when I grinder the oats. I also brushed the bread with dairy free milk and sprinkled with sesame seeds.
That sounds lovely!
love it
Thank you so much!
can use chia seeds to replace pysillum husk
No, it won’t work at all. Both ingredient have different properties, chia seeds won’t add the chew you get from psyllium husk.
I followed this recipe exactly and the mixture came out too wet.
If so, the issue is your psyllium husk brand or type, it doesn’t absorb the moisture enough. Simply add a bit more to fix the dough before baking.
I will definitely try it. thanks for sharing
My pleasure! let me know how it goes.
I was skeptical but I have to say this bread surprised me more every time I ate it. I followed your tips to the tee since I am a new gluten free baker. Nailed it on every account. I will omit the bagel seasoning for my normal loaf, but- this thing eats like an ACTUAL artisan bread. Not sad and flat. Not quite as dense as a true rye or pumpernickel. Delightfully and properly chewy, not crumby. I made French toast, grilled cheese, a plain PB/J, dipped in some soup, and each time I ate it the bread got better. I took me 4 days to go through it and it honestly got better somehow in flavor and texture each day. Thank you for a well written recipe and a wonderful new chapter in my gluten free life.
Thank you so much, your comment made my day!
I’ve made this twice now. It’s a huge success in our household. I truly don’t think our guts have ever been so healthy!
Goes brilliantly with Marmite peanut butter.
Thank you for so many fab recipes
I am so happy you enjoy the bread so much!
excellent
Thank you for trying my recipes! I am happy you love this bread.
Thank you for trying my recipes!
Would Almond flour work in place of oat flour for a higher protein count?
It could, but since almond flour has way less fiber, you will need more and the bread won’t be as firm.
hello there,
thankyou so much for generously sharing your amazing recipes. As someone with various health conditions, I’m dying to try this no knead gluten free quinoa bread but I have some important questions I need to ask. Because of my arthritis, I bought bio quinoa flour, is that ok and does it change any of the quantities of water or other ingredients? I am also intolerant to oats and have only found whole grain brown millet flour and sorghum flour in Portugal, which should I use as a substitute (if any) and in what quantities? Again, I dont know if they require adjustments to quantities of the remaining ingredients. Thank you so much in advance for your much needed feedback.
Best wishes,
Cláudia
Thank you for joining me here. Quinoa flour will not work for this recipe, it’s not working as blended, soaked quinoa. Oats can be swapped for millet flour, quinoa flakes.