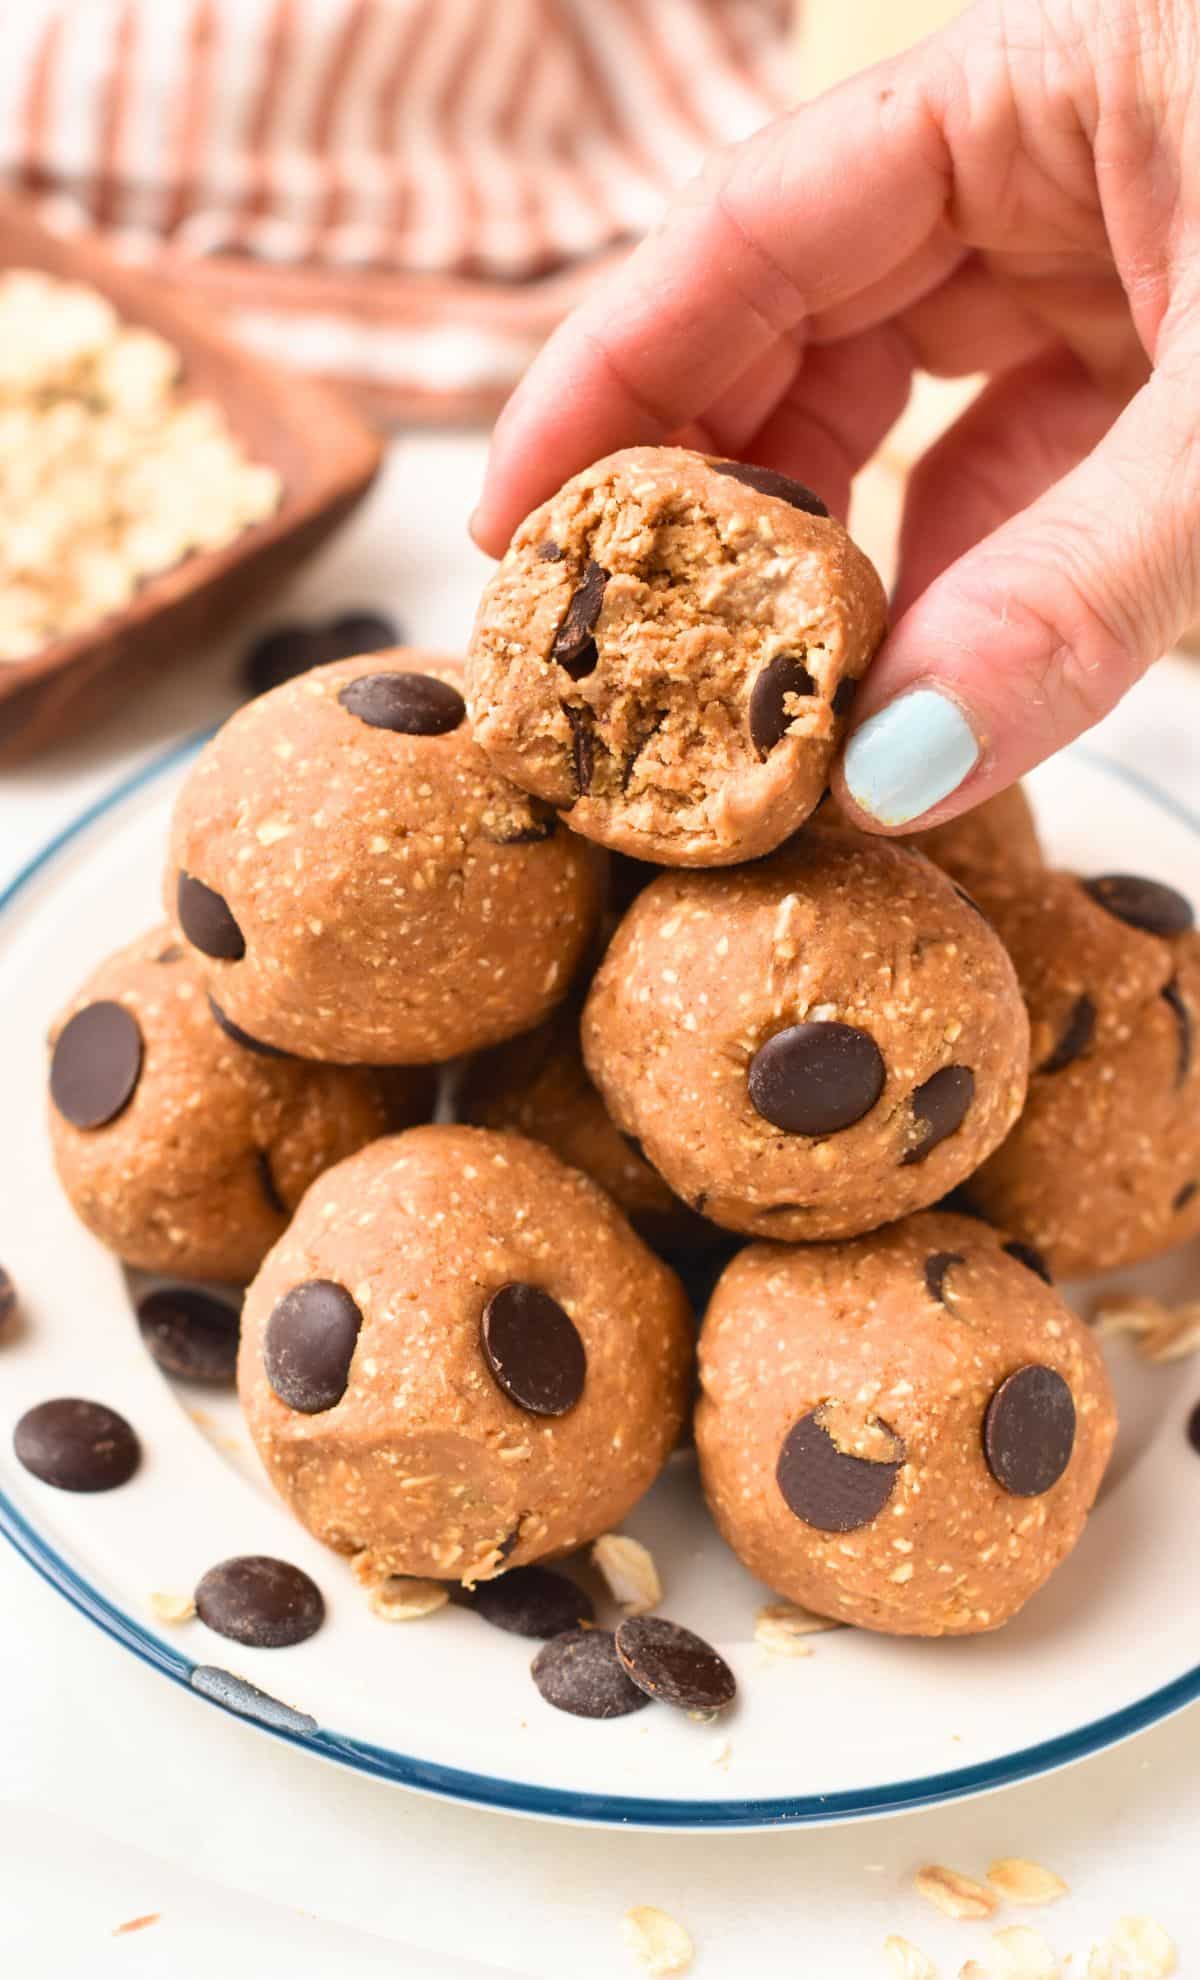
These Peanut Butter Protein Balls are easy energy balls loaded with over 6 grams of protein for only 88 Calories, and they are ready in under 10 minutes for a perfect post-workout snack.

They are a delicious snack, healthier than store-bought alternatives, easy on the gut, and low in fats.
While the whole recipe is just below, don’t miss all my tips further down, including ingredient swaps, my cooking tips, and step-by-step shots!
Like This Recipe?
Leave a comment below or head to our Facebook page where I reply to (almost) all comments, our Instagram page for inspiration, or our Pinterest for saving recipes!

Peanut Butter Protein Balls
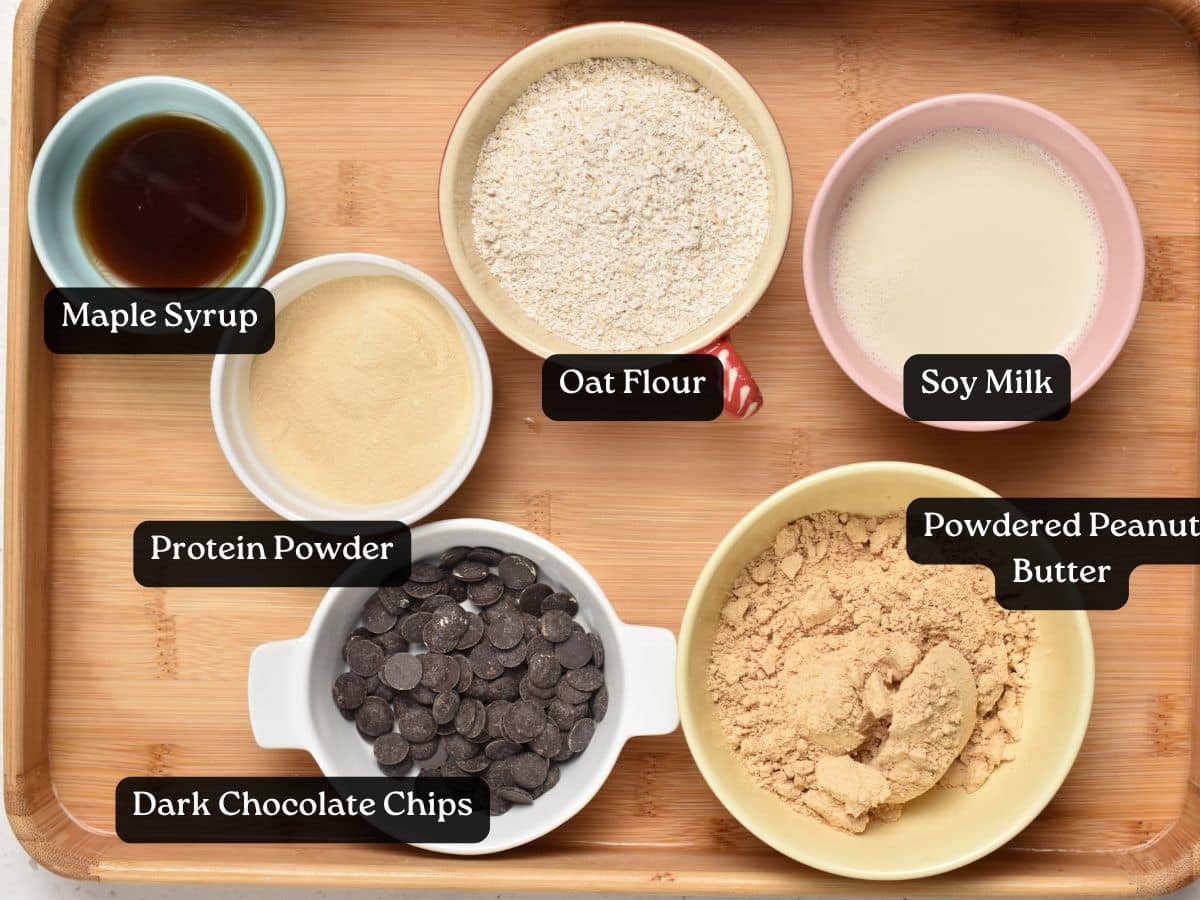
Ingredients
- ¾ cup Oat Flour - (note 1)
- ¾ cup Powdered Peanut Butter - PB2 or PBFit (note 2)
- ½ cup Soy Milk - (note 3)
- ¼ cup Vanilla Protein Powder - (note 4)
- 2 tablespoons Maple Syrup - (note 5)
Optional
- ¼ cup Mini Dark Chocolate - (note 6)
Instructions
- In a mixing bowl, whisk oat flour, powdered peanut butter, and vanilla protein powder.
- Add maple syrup and soy milk. Use a rubber spatula to combine at first, then lightly oil your hands and squeeze the dough to bring it together. If too dry, add a little more milk. If too runny, add more protein powder until it forms a soft dough.
- Fold in the mini chocolate chips if used, and stir to incorporate evenly.
- Divide the dough into 10 balls of the same size/weight, and lightly oil your hands to roll them into smooth balls.
Notes
Nutrition
Ingredients and Substitutions
You only need six simple ingredients to make this recipe. Here’s how to pick and swap them.
- Oat Flour – This forms the main base of your protein balls, giving them a wholesome texture and helping them hold their shape. You can use almond flour as an alternative, but you’ll need to reduce the soy milk to ⅓ cup to ensure the balls aren’t too soft.
- Powdered Peanut Butter – This powdered peanut butter delivers a strong peanut butter flavor and a concentrated source of protein without the extra fat. For a chocolate version, you can opt for chocolate powdered peanut butter.
- Soy Milk – This liquid binds all the ingredients together to create the dough. While any plant-based milk works, soy milk adds more protein to your protein balls.
- Vanilla Protein Powder – This significantly boosts the protein content of your snack. These measurements are based on pea protein powder, so if you use a different type, you might need to adjust the amount of soy milk slightly, as protein powders vary in how much liquid they absorb.
- Maple Syrup – This provides natural sweetness and helps bring the dough together. To reduce calories, you can use sugar-free maple syrup instead.
- Mini Dark Chocolate Chips – These are an optional addition that adds pockets of chocolate crunch and texture to your protein balls. You can use sugar-free chocolate chips if you prefer, and feel free to add more if you like extra chocolate!
How to Make Peanut Butter Protein Balls
This recipe is super simple to whip up in just a few minutes. Here’s how in pictures.

Combine the dry ingredients in a mixing bowl.

Add the wet ingredients and work the batter.

Form a sticky dough and oil your hands.
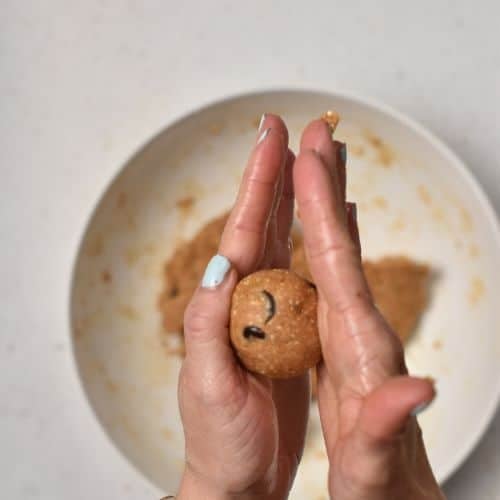
Roll the balls in your hands and keep them in the fridge.
Carine’s Tips
Let me share a few more tips for perfect protein balls.
- Hands-On Mixing – After a few seconds of stirring with a spatula, your dough might look dry. Don’t add extra liquid immediately! Start by squeezing the dough with lightly oiled hands; it’s sticky, but it usually comes together. If it’s still too dry at this point, then add a tiny bit more milk, one teaspoon at a time.
- Adjusting Consistency – Protein powders vary significantly in how much liquid they absorb (pea protein, hemp protein, whey protein, etc.). Always feel free to adjust the dough’s consistency by adding a tiny bit more milk if it’s too dry and crumbly, or a little more oat flour or protein powder if it’s too runny or soft.
- Oil Your Hands – Always lightly oil your hands before rolling the dough into balls. This prevents sticking and helps you create smooth, perfectly shaped protein balls.
- Flavor Variations – Get creative with your protein balls! Fold in other ingredients like chopped nuts, freeze-dried fruits, or even more chocolate chips to create a range of different flavors.
- Make Ahead & Freeze – These protein balls are perfect for meal prep! You can freeze them for up to 1 month. Just place them in an airtight container or freezer-safe bag. When you’re ready to eat one, let it thaw at room temperature for about 2 hours.
- Refrigerate for Firmness – It’s essential to store these protein balls in the fridge. They will become too soft at room temperature, so keeping them chilled helps them maintain their firm texture. Store them in an airtight container for up to 1 week.


I can’t tolerate regular protein powders. I use pumpkin seed protein powder. What are your thoughts about using that?
I do use pumpkin seed protein powder all the time, it work well too.